Resources
Quick Start
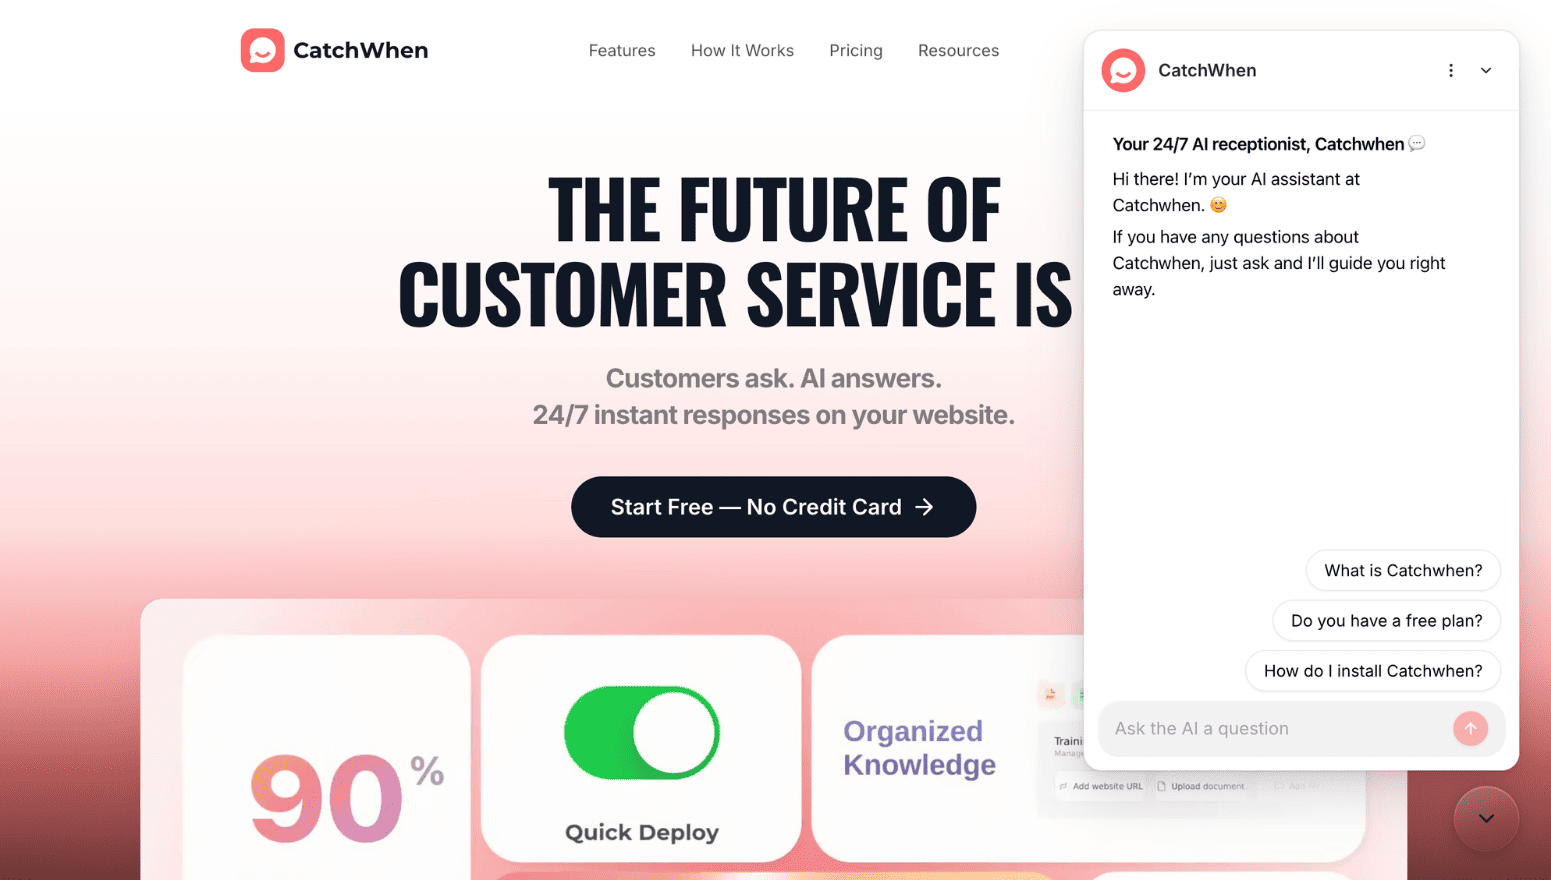
Build Your First Website Agent
Create, train, and deploy your first Website Agent in under 5 minutes. Follow this step-by-step guide to get your intelligent assistant live on your website.
In just a few minutes, you'll have a fully functional Website Agent answering questions about your business and engaging with your website visitors. Let's get started!
Prerequisites
You'll need an active CatchWhen account to follow this guide. Sign up here if you haven't already.
Overview
Here's what we'll accomplish in this guide:
Create & Train Your Website Agent
Customize & Test
Deploy to your Website
Estimated time: 5 minutes from start to finish
Step 1: Create & Train Your Website Agent
Sign In to CatchWhen
After signing in, you'll be brought directly into the onboarding flow where your first Website Agent setup begins automatically.
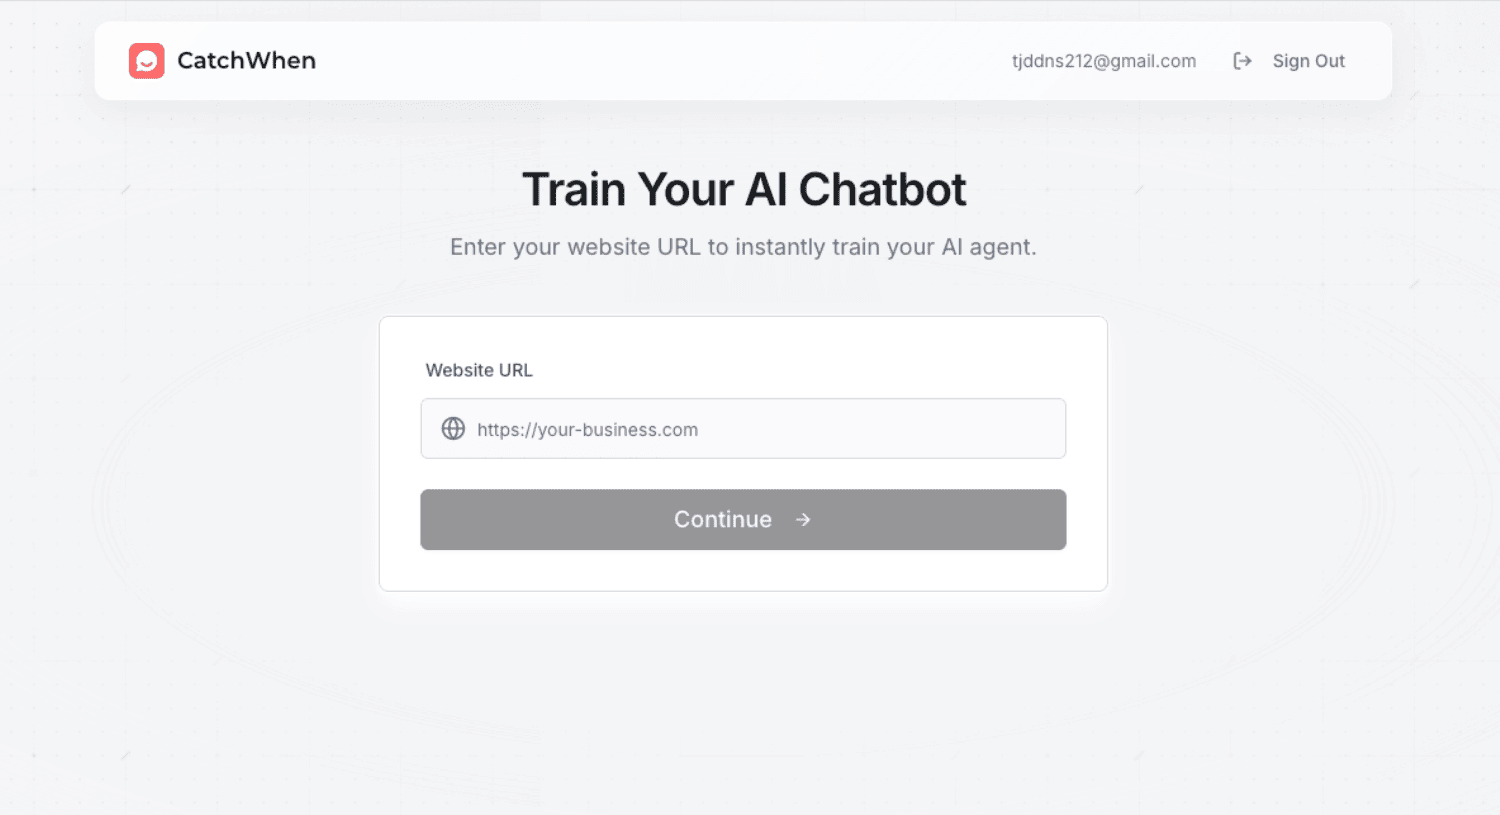
Add Your Website URL
Paste your business website URL. Your Website Agent will learn from your pages automatically.
Choose Your Training Data
Your Website Agent needs information to learn from. You can train it using various data sources:
Documents
Business documents, manuals, product information, and policies.
FAQs
Specific questions and answers you want your Website Agent to know.
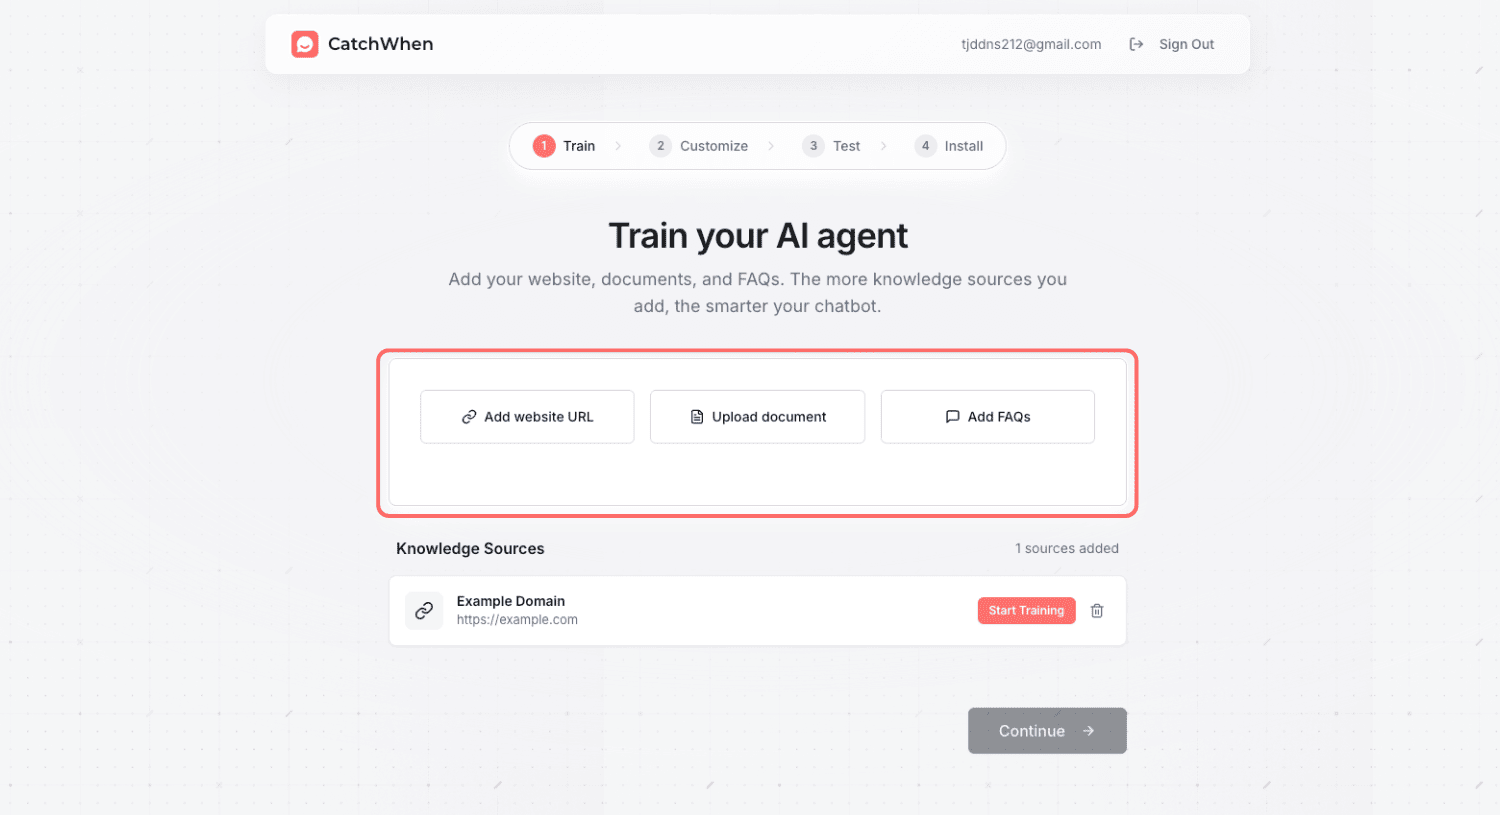
Review Training Progress
Website training starts automatically after the website is added. Documents and FAQs also train automatically as soon as you upload them.
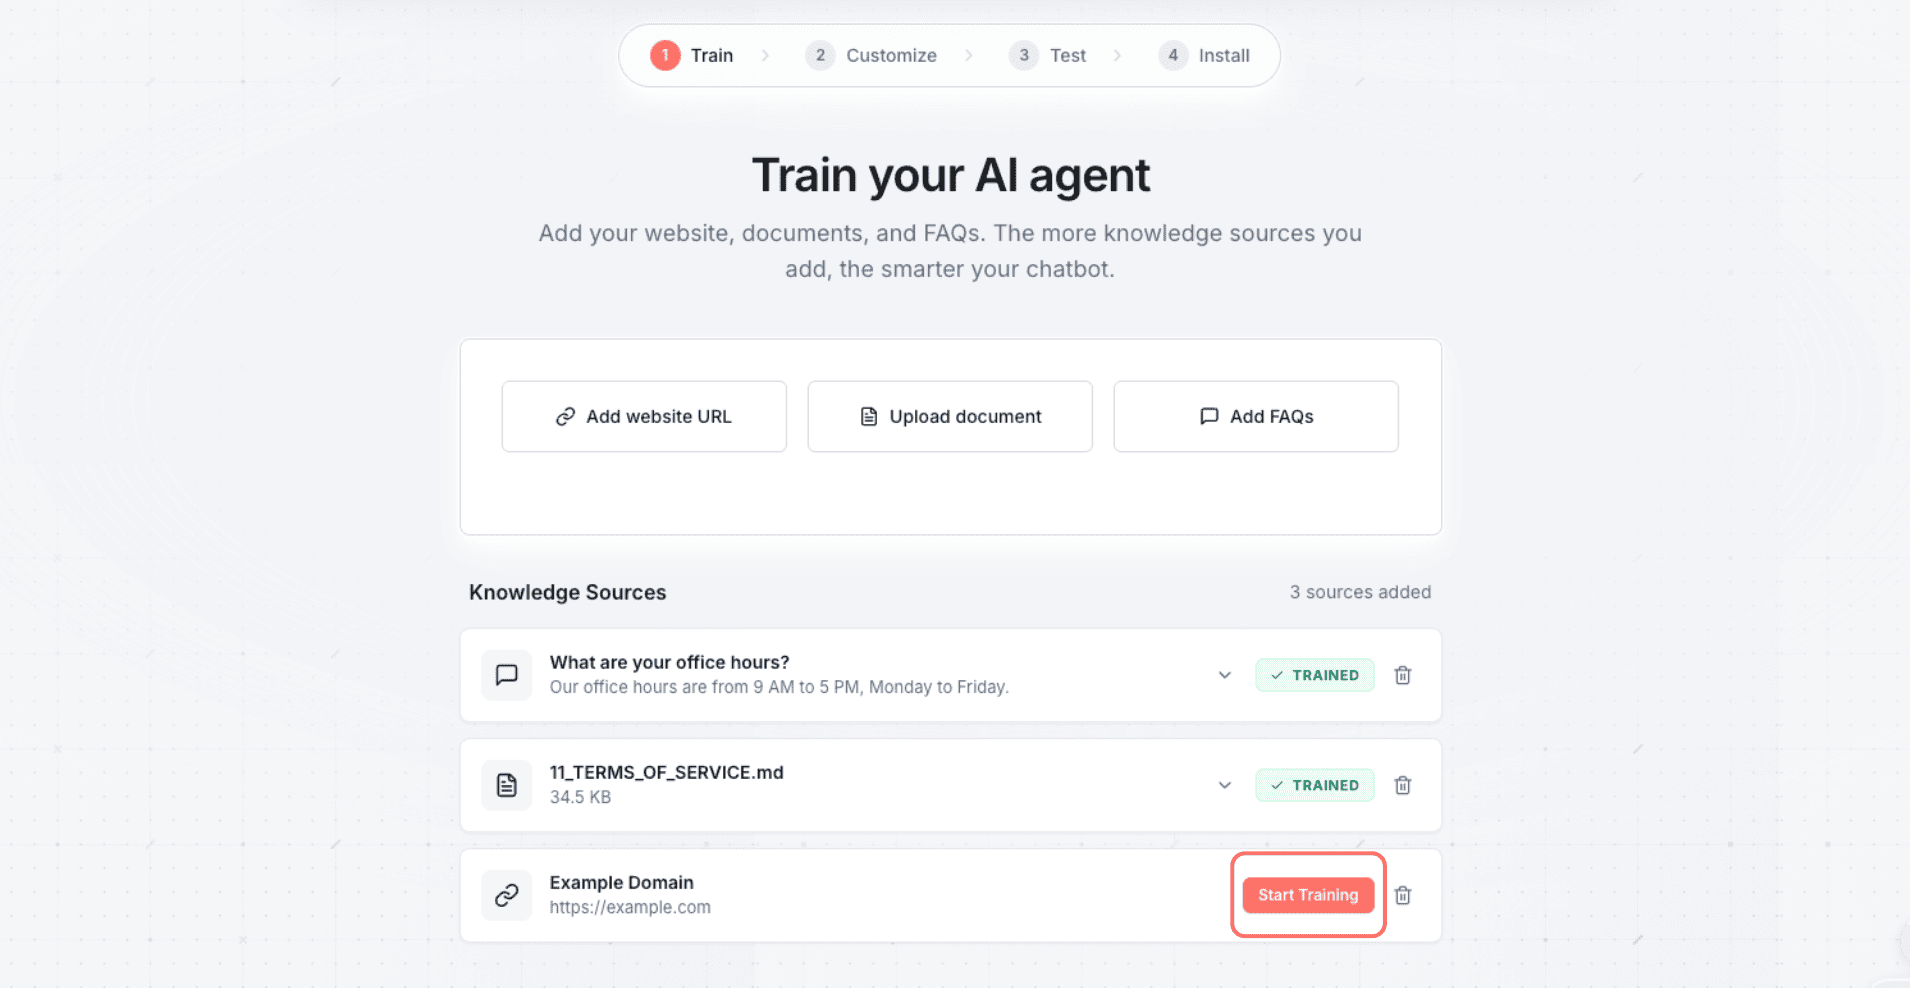
Source Limits: Different plans have different limits on the number of knowledge sources you can add. Check your plan if you hit any limits.
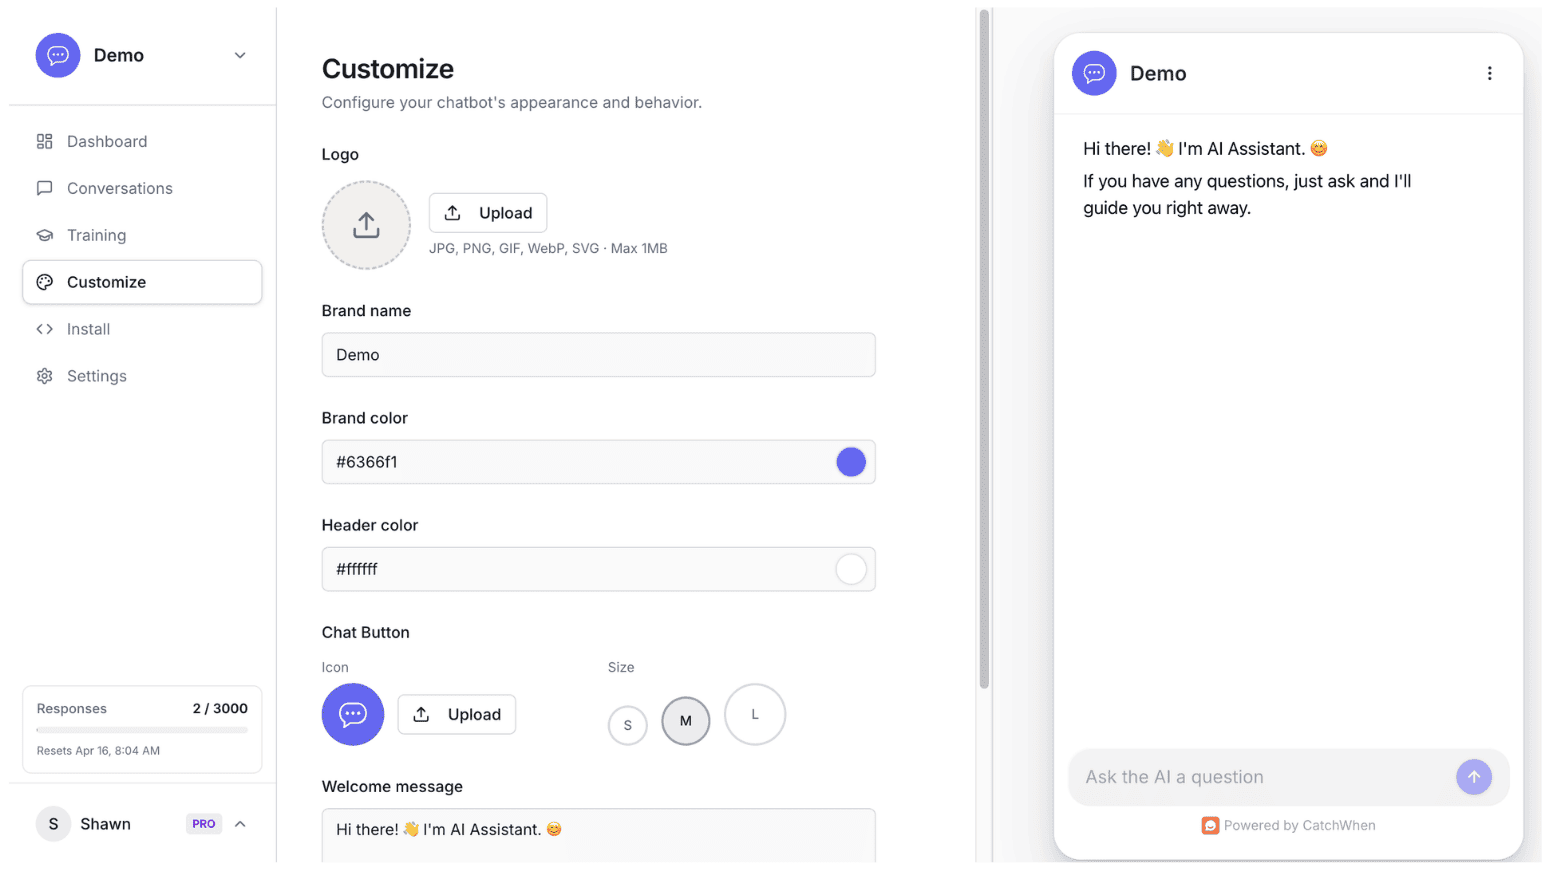
Step 2: Customize & Test Your Website Agent
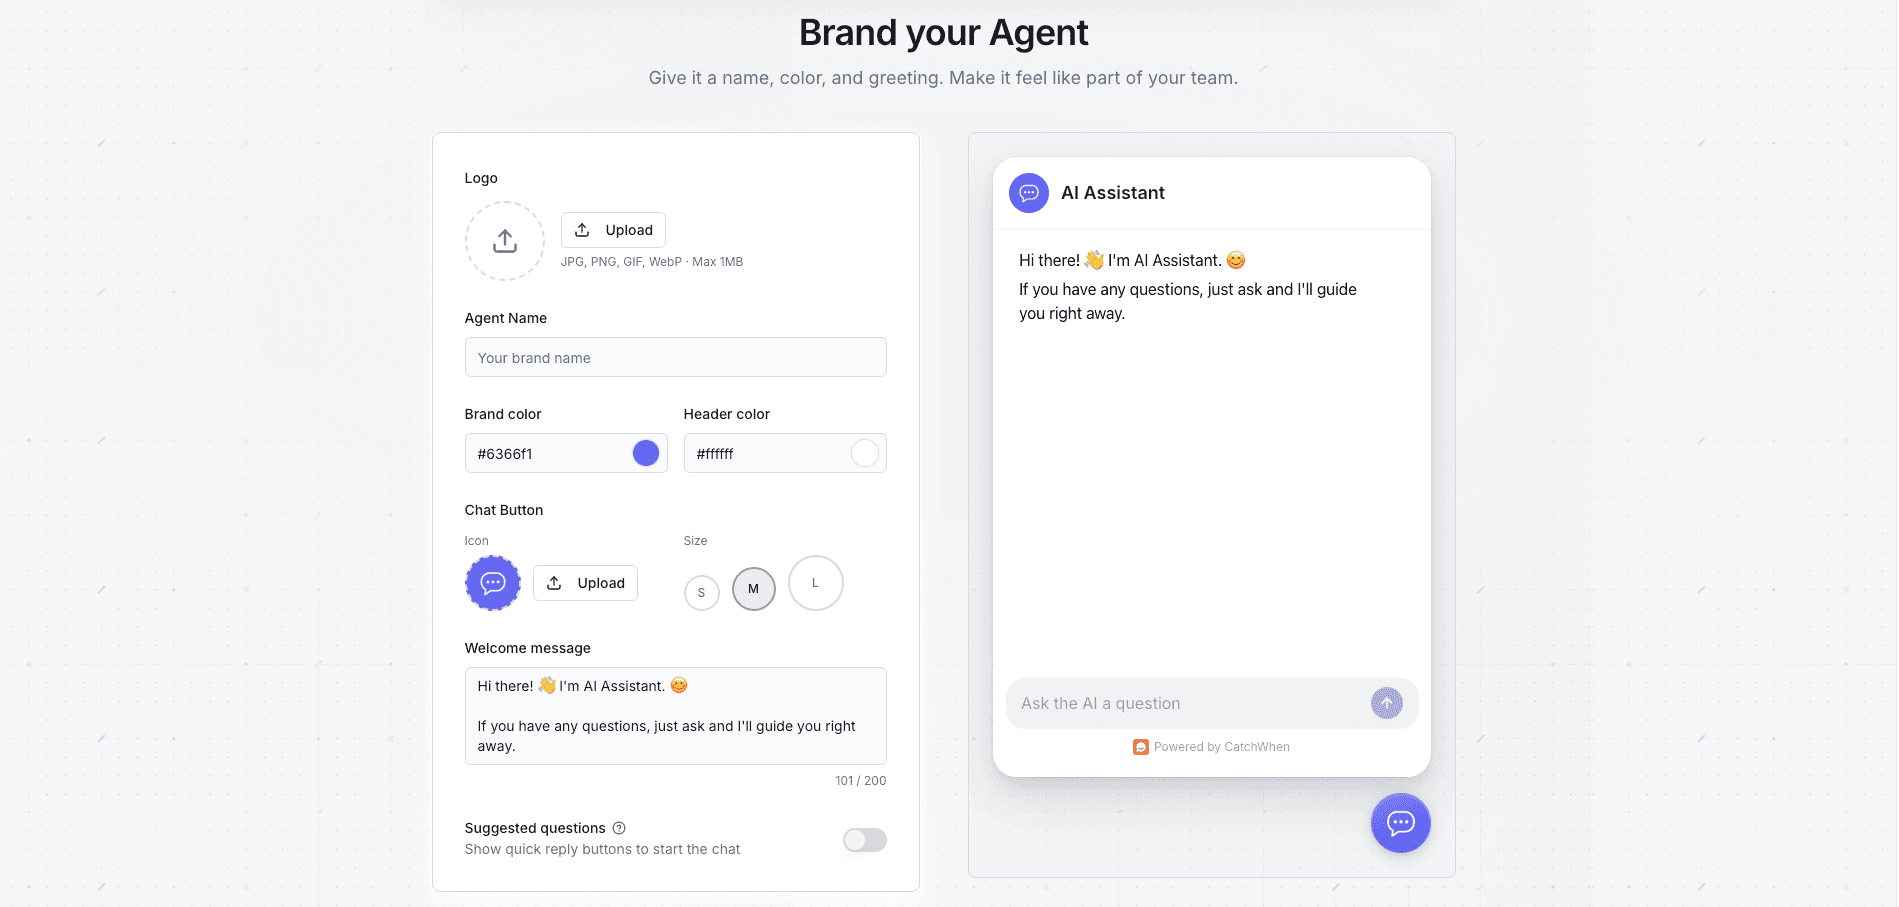
Fine-Tune Your Website Agent
After training completes, customize your Website Agent's appearance (colors, logo, welcome message, starter questions) and test how it responds before going live.
Evaluate Response Quality
As you test, look for:
Accuracy: Are responses factually correct?
Relevance: Does it answer what was asked?
Completeness: Are responses comprehensive but concise?
Tone: Does it match your brand voice?
Step 3: Deploy to Your Website
Get Your Embed Code
Copy the provided JavaScript code snippet:

Add Code to Your Website
Locate Your Site's HTML
<head> section or before the closing </body> tag.Paste the Code
Not sure where to paste? We have step-by-step install guides for WordPress, Shopify, Wix, Webflow, Squarespace, Framer, Bubble, and more. See platform guides.
Save and Publish
Verify Installation
Visit your website and look for the chat button. Click it to test the integration!
Success! Your Website Agent is now live and ready to help your website visitors.
Customize Appearance (Optional)
Want to match your brand more closely? Revisit Customize anytime to fine-tune style and content.
Congratulations!
You've successfully created, trained, tested, and deployed your first Website Agent! Here's what you've accomplished:
Created an intelligent Website Agent trained on your data
Tested and validated response quality
Deployed it live on your website
Made it accessible to your visitors 24/7
Need help? Our support workspace is here to assist you. Visit our Help Center for any questions.