Resources
Add the Chat Widget to Your WordPress Site
This guide shows you how to embed the CatchWhen chat widget into your WordPress site using the free WPCode plugin. You'll install the plugin and paste the embed code as an HTML snippet.
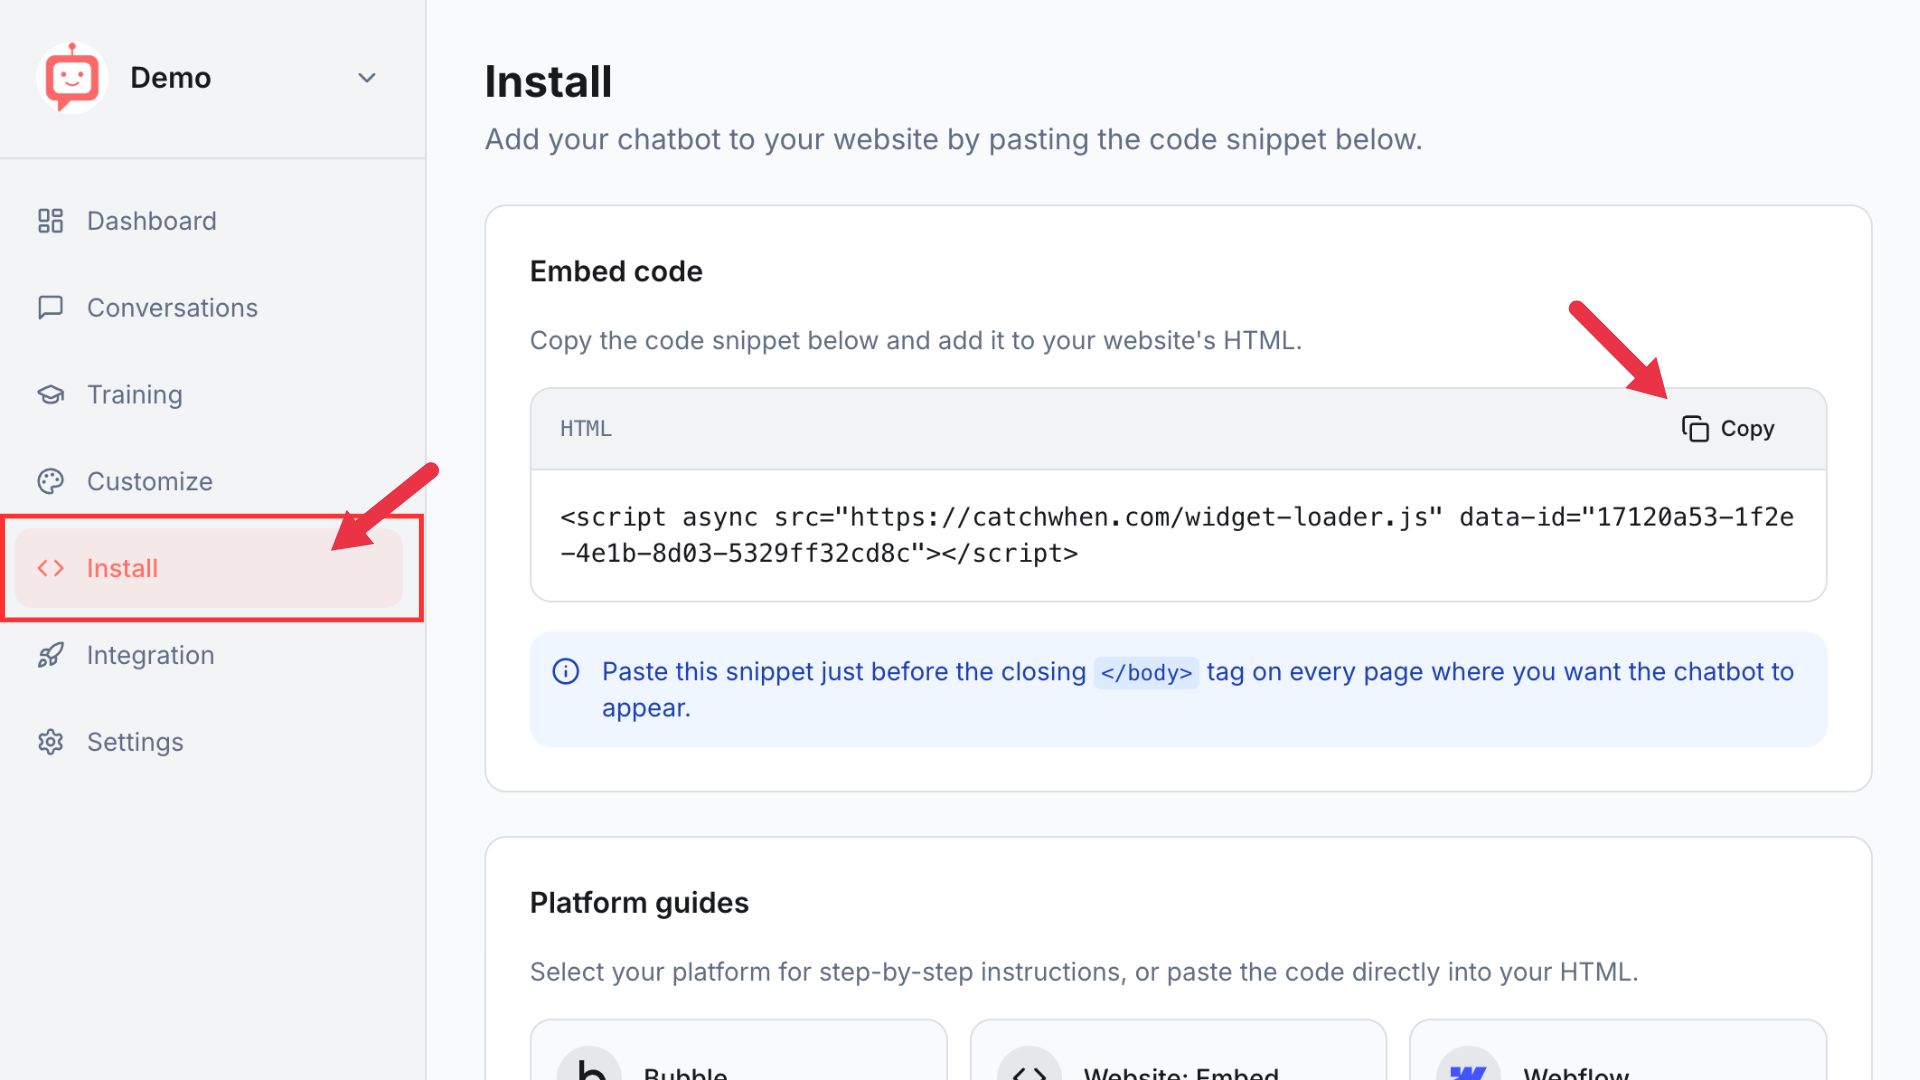
Copy your CatchWhen embed code
Navigate to your Dashboard page and click the Install tab in the left menu. You'll see a code snippet on the screen. Click the Copy button.
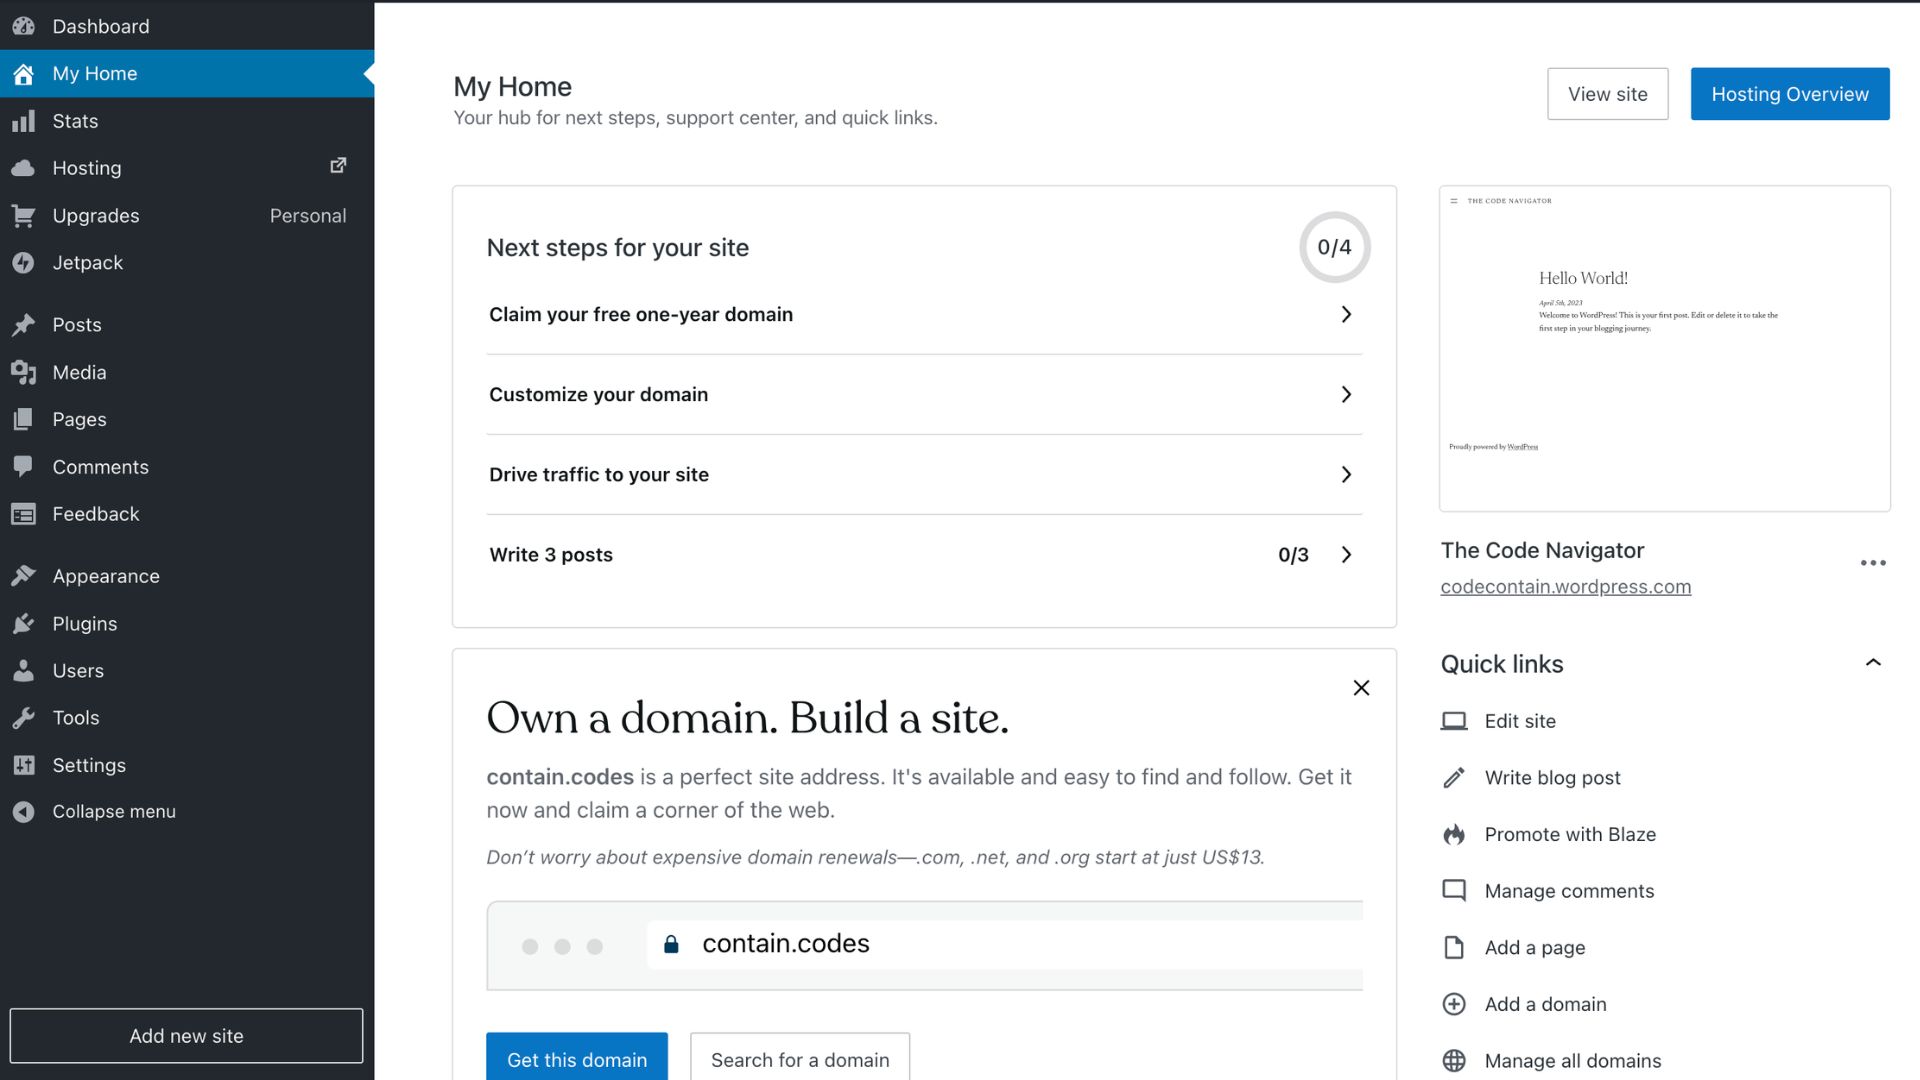
Log in to your WordPress dashboard
Sign in to your WordPress account and go to your site's home screen. You should see the My Home page with the left sidebar menu.
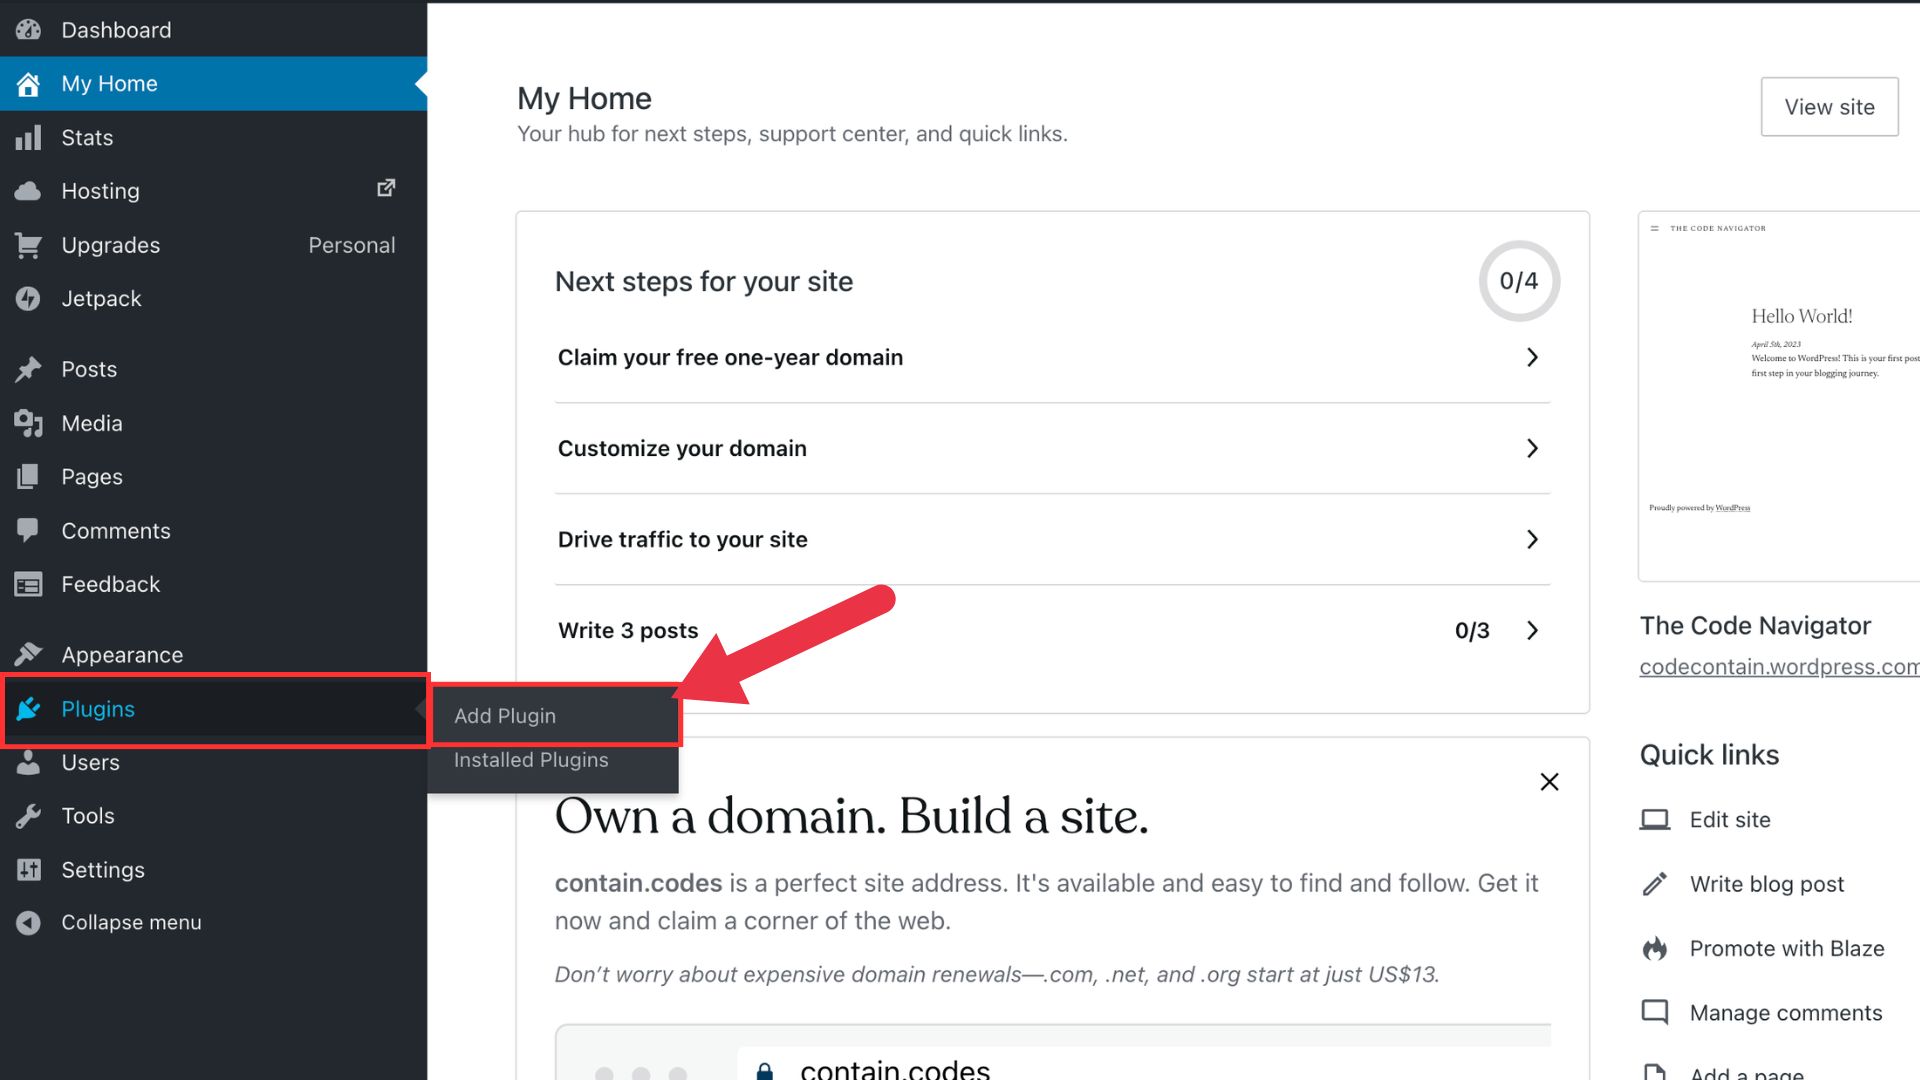
Go to Plugins and click Add Plugin
In the left sidebar menu, hover over Plugins and click Add Plugin from the dropdown.
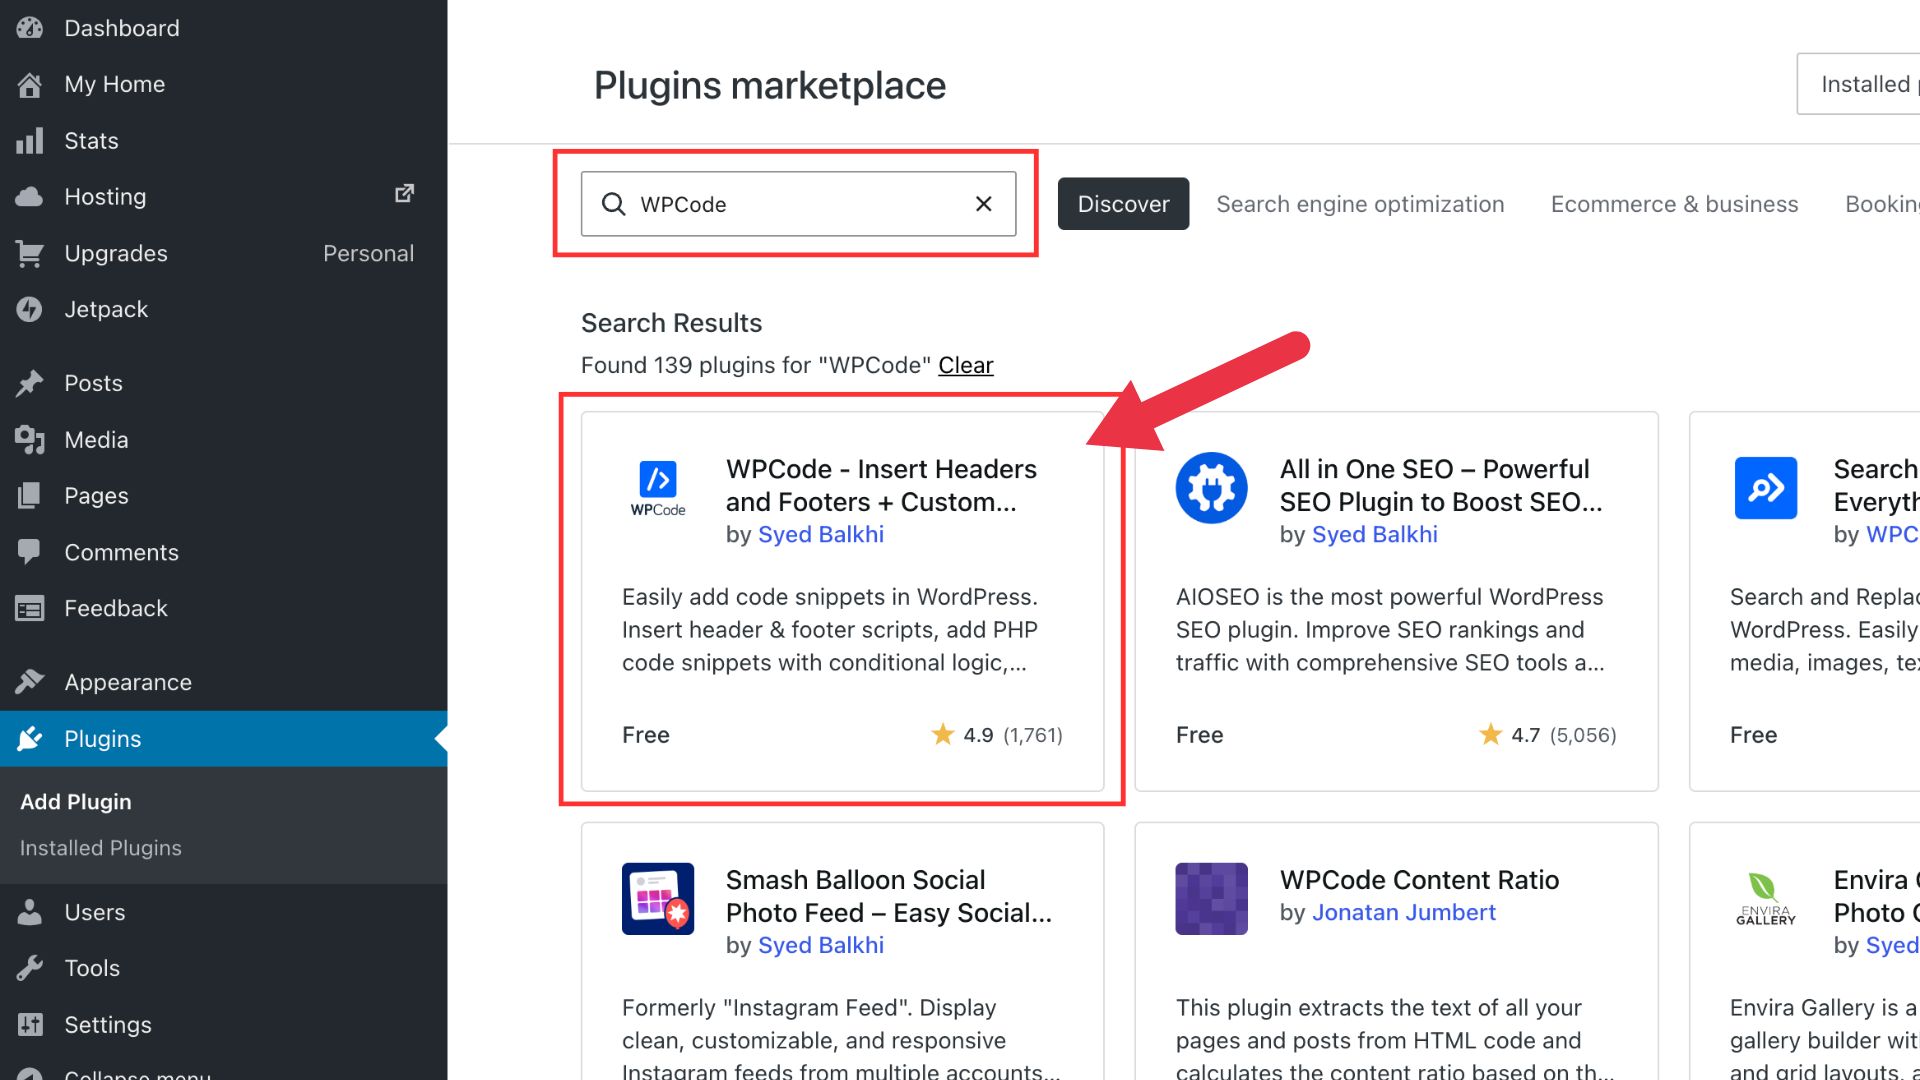
Search for WPCode plugin
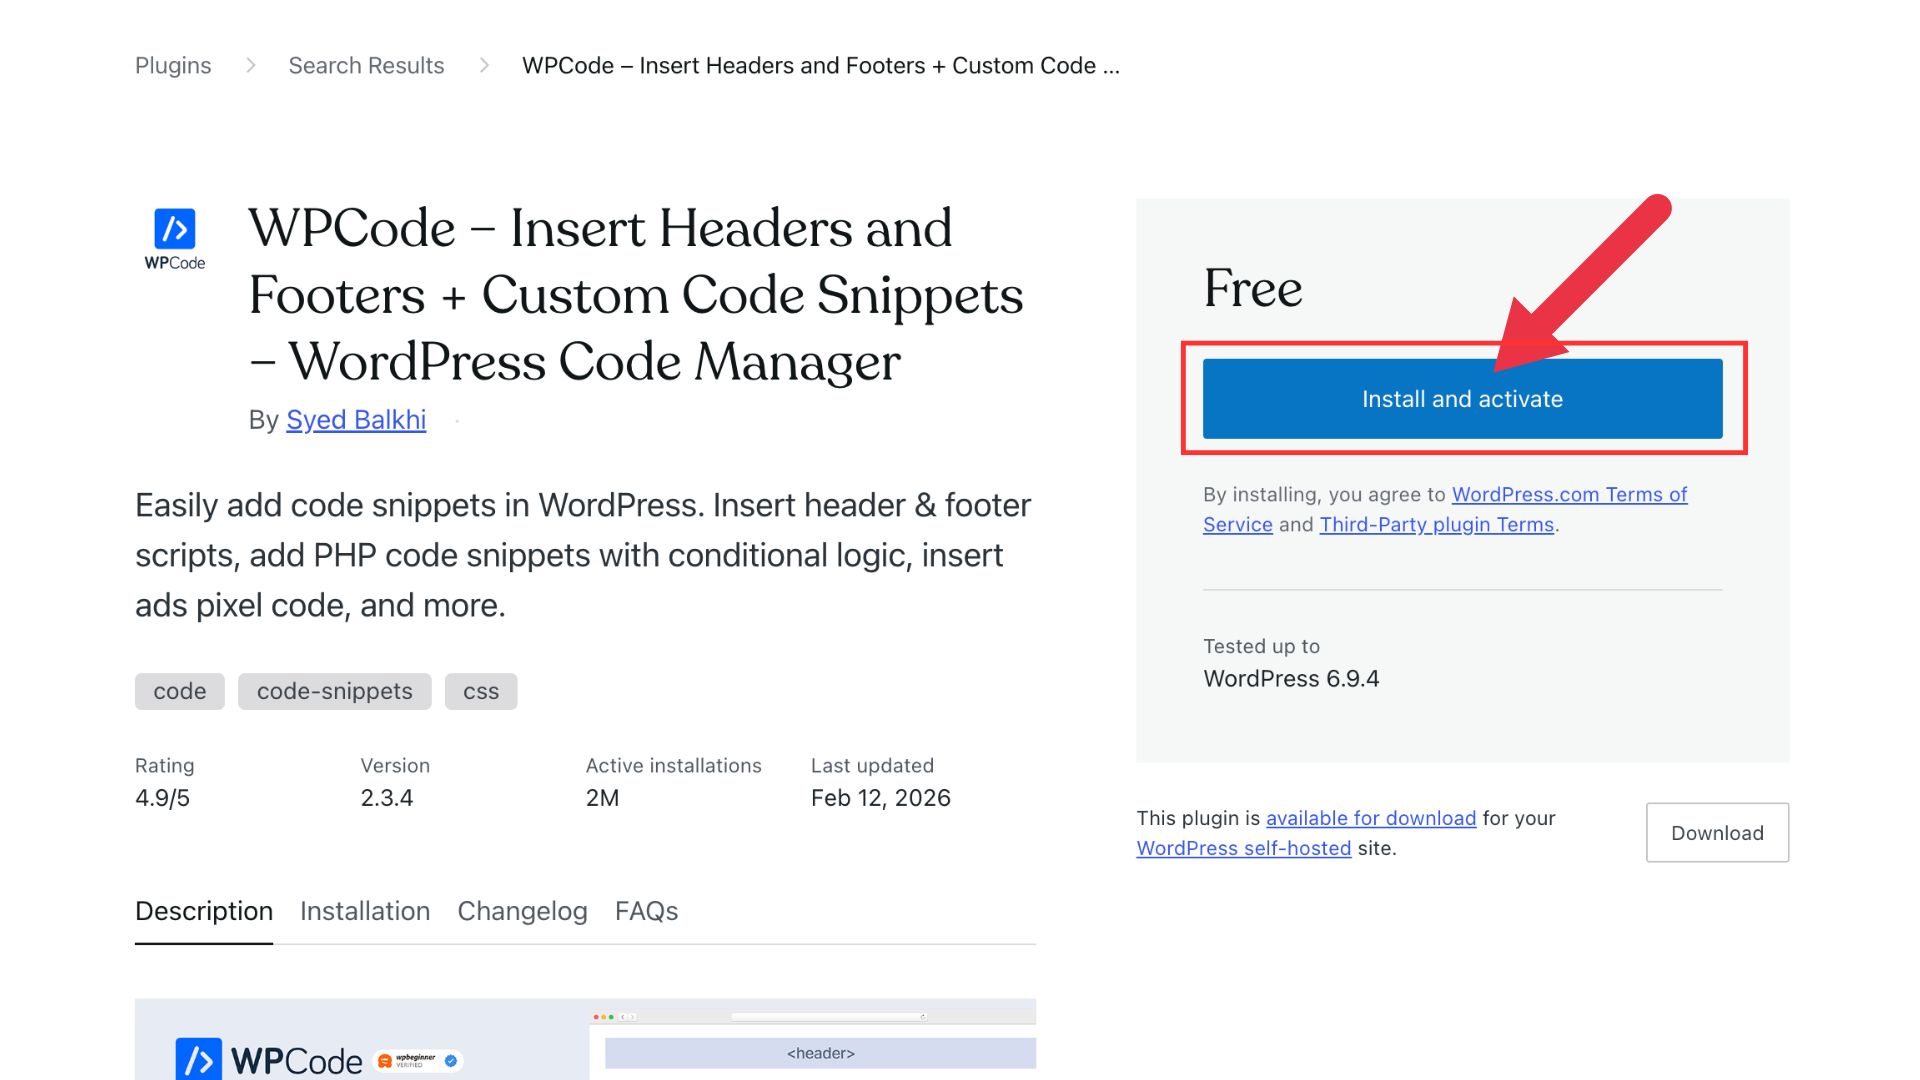
In the search bar, type WPCode and find the plugin called WPCode – Insert Headers and Footers + Custom Code Snippets – WordPress Code Manager by Syed Balkhi. Click on it to open the plugin page.
Install and activate the plugin
On the plugin page, click the Install and activate button on the right side. Wait for the installation to complete.
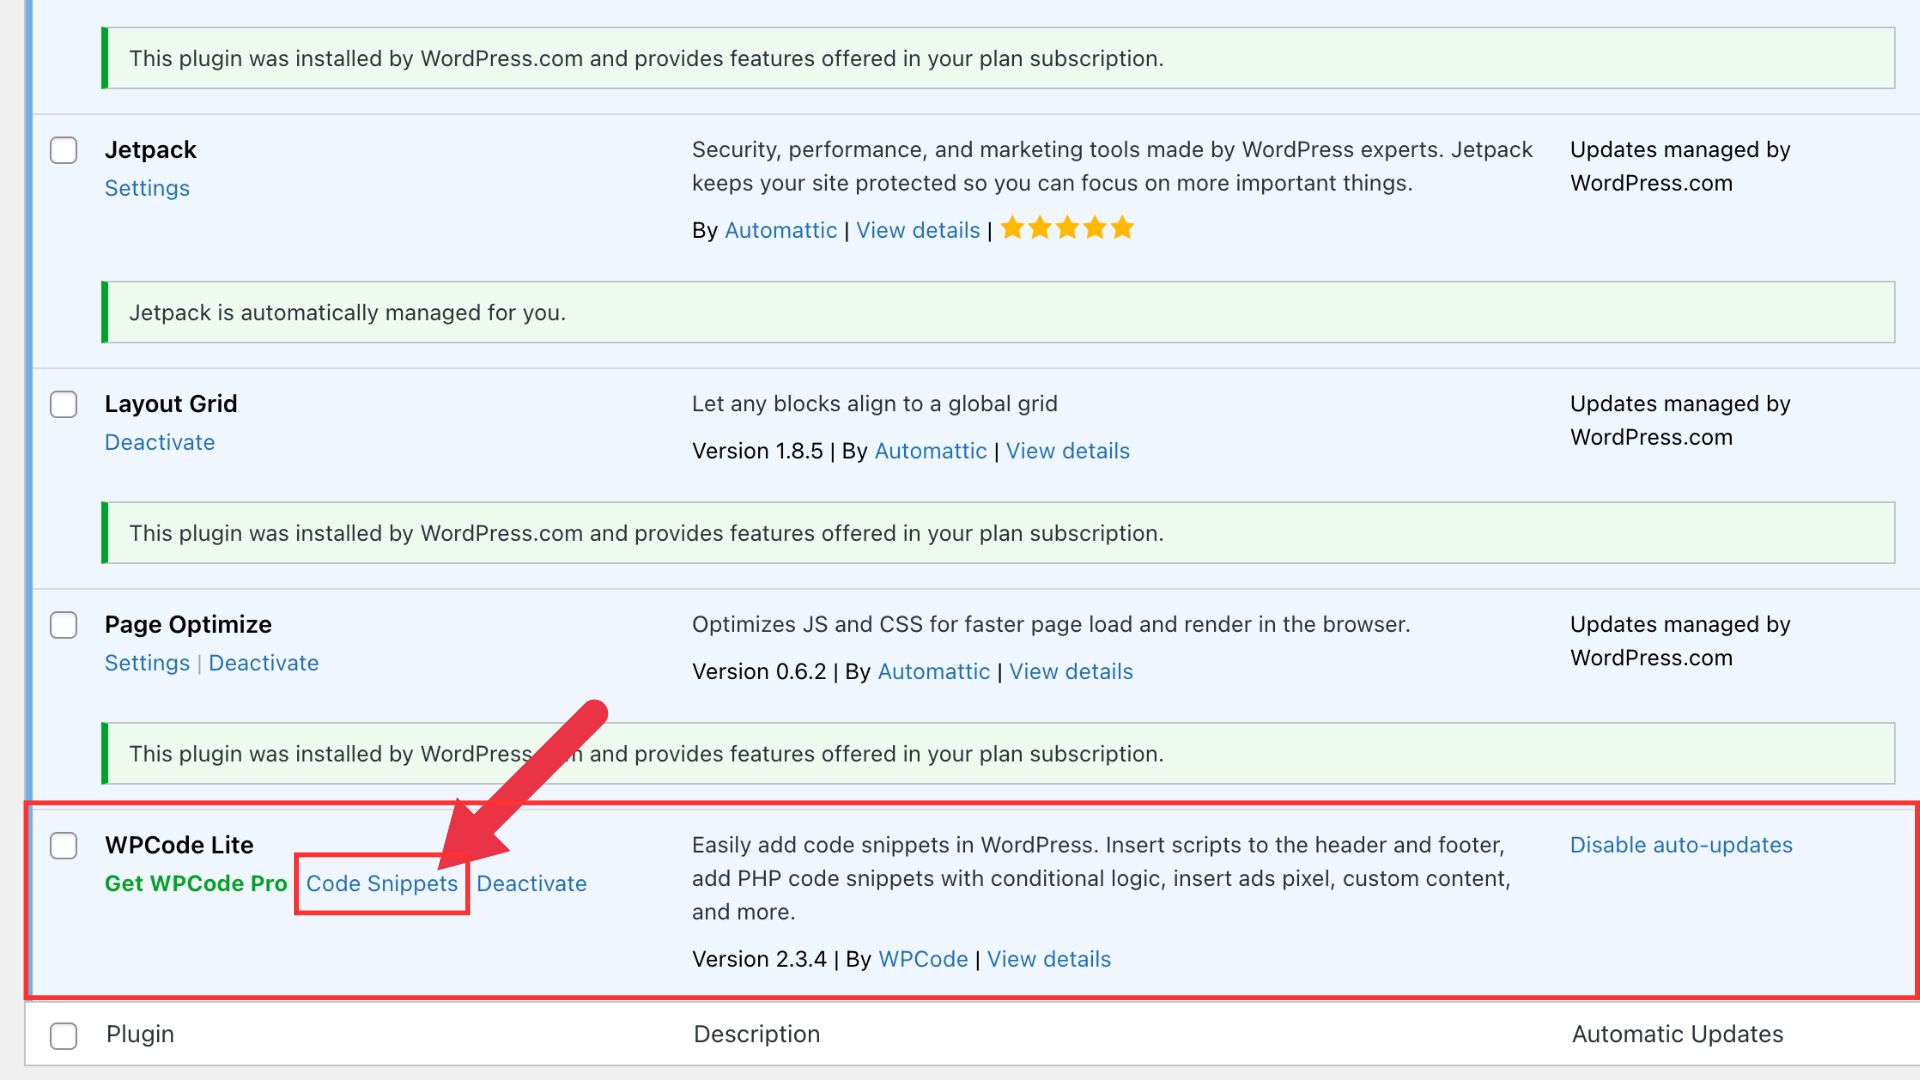
Open Code Snippets
After installation, you'll see the plugin list. Find WPCode in the list and click Code Snippets in the left sidebar menu to open the snippets page.
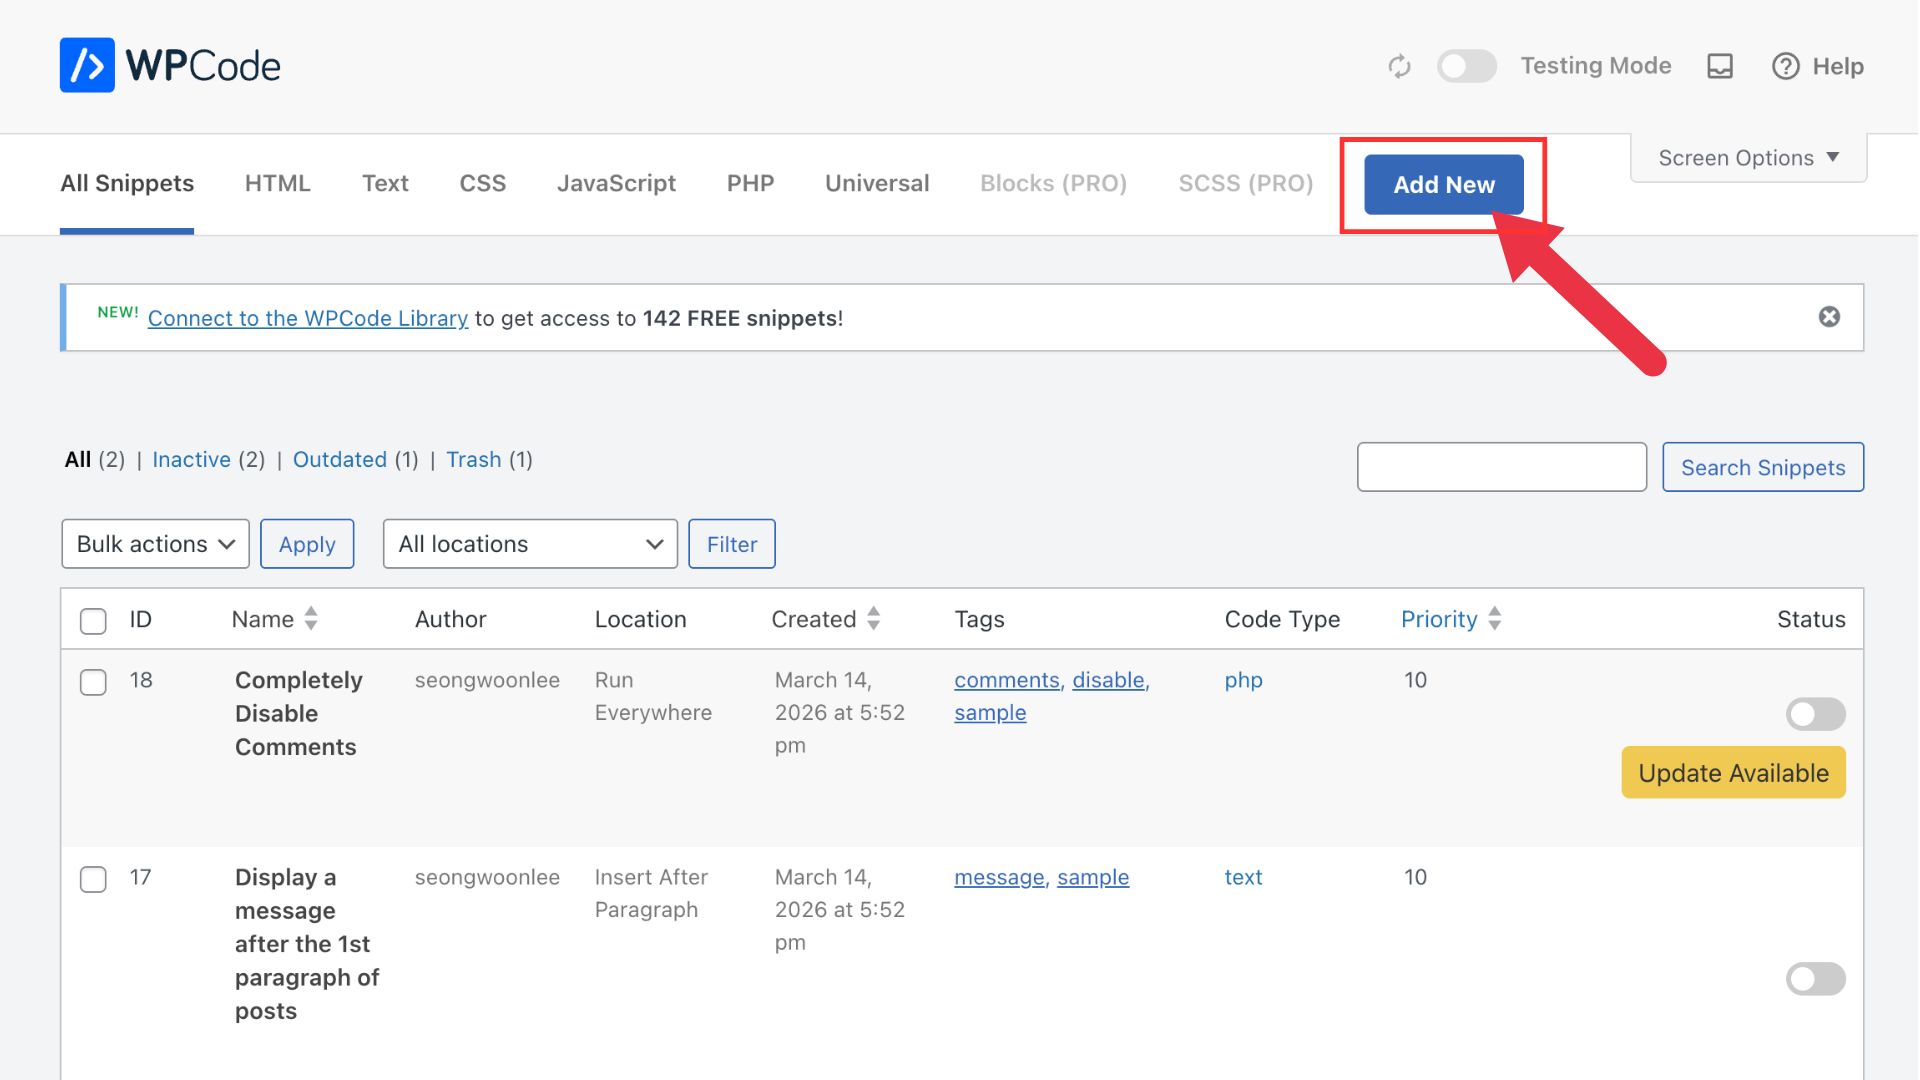
Click Add New
On the snippets page, click the Add New button at the top.
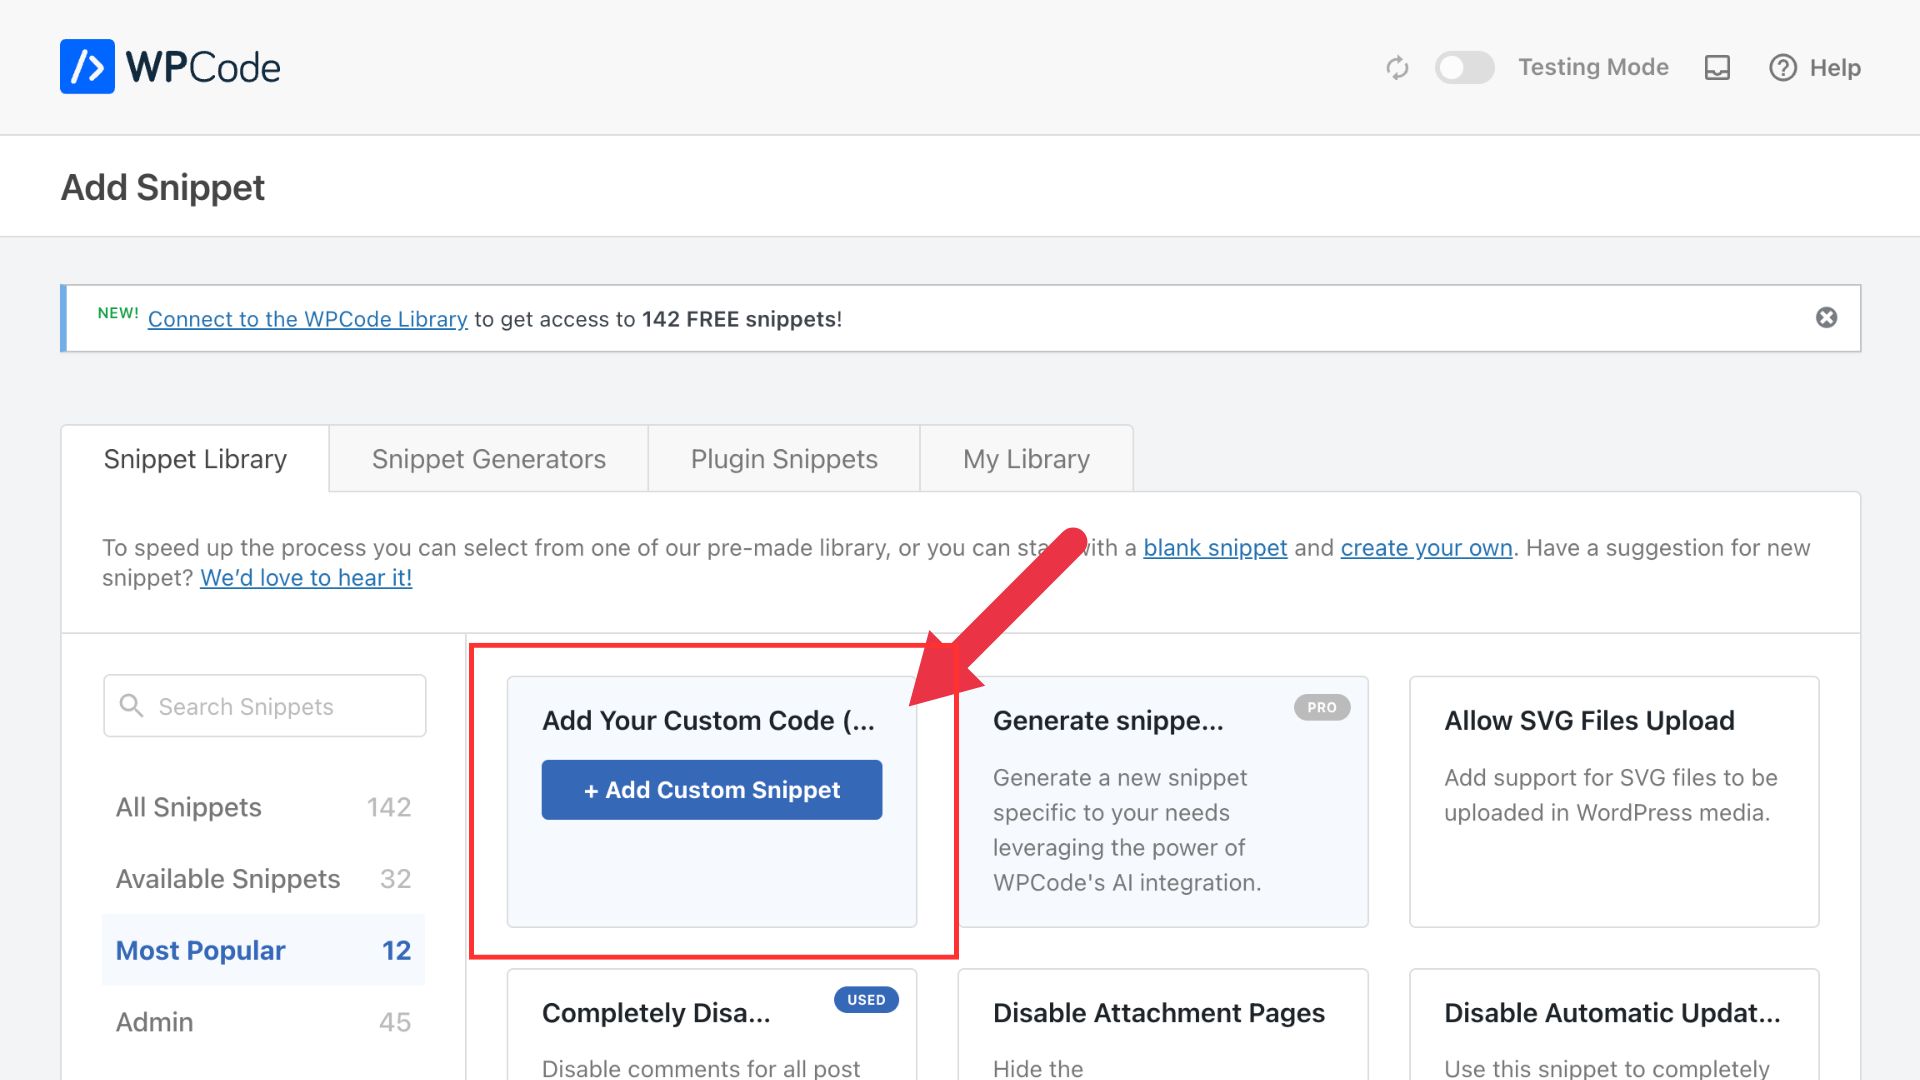
Select Add Your Custom Code
On the Add Snippet page, find the Add Your Custom Code (New Snippet) card and click + Add Custom Snippet.
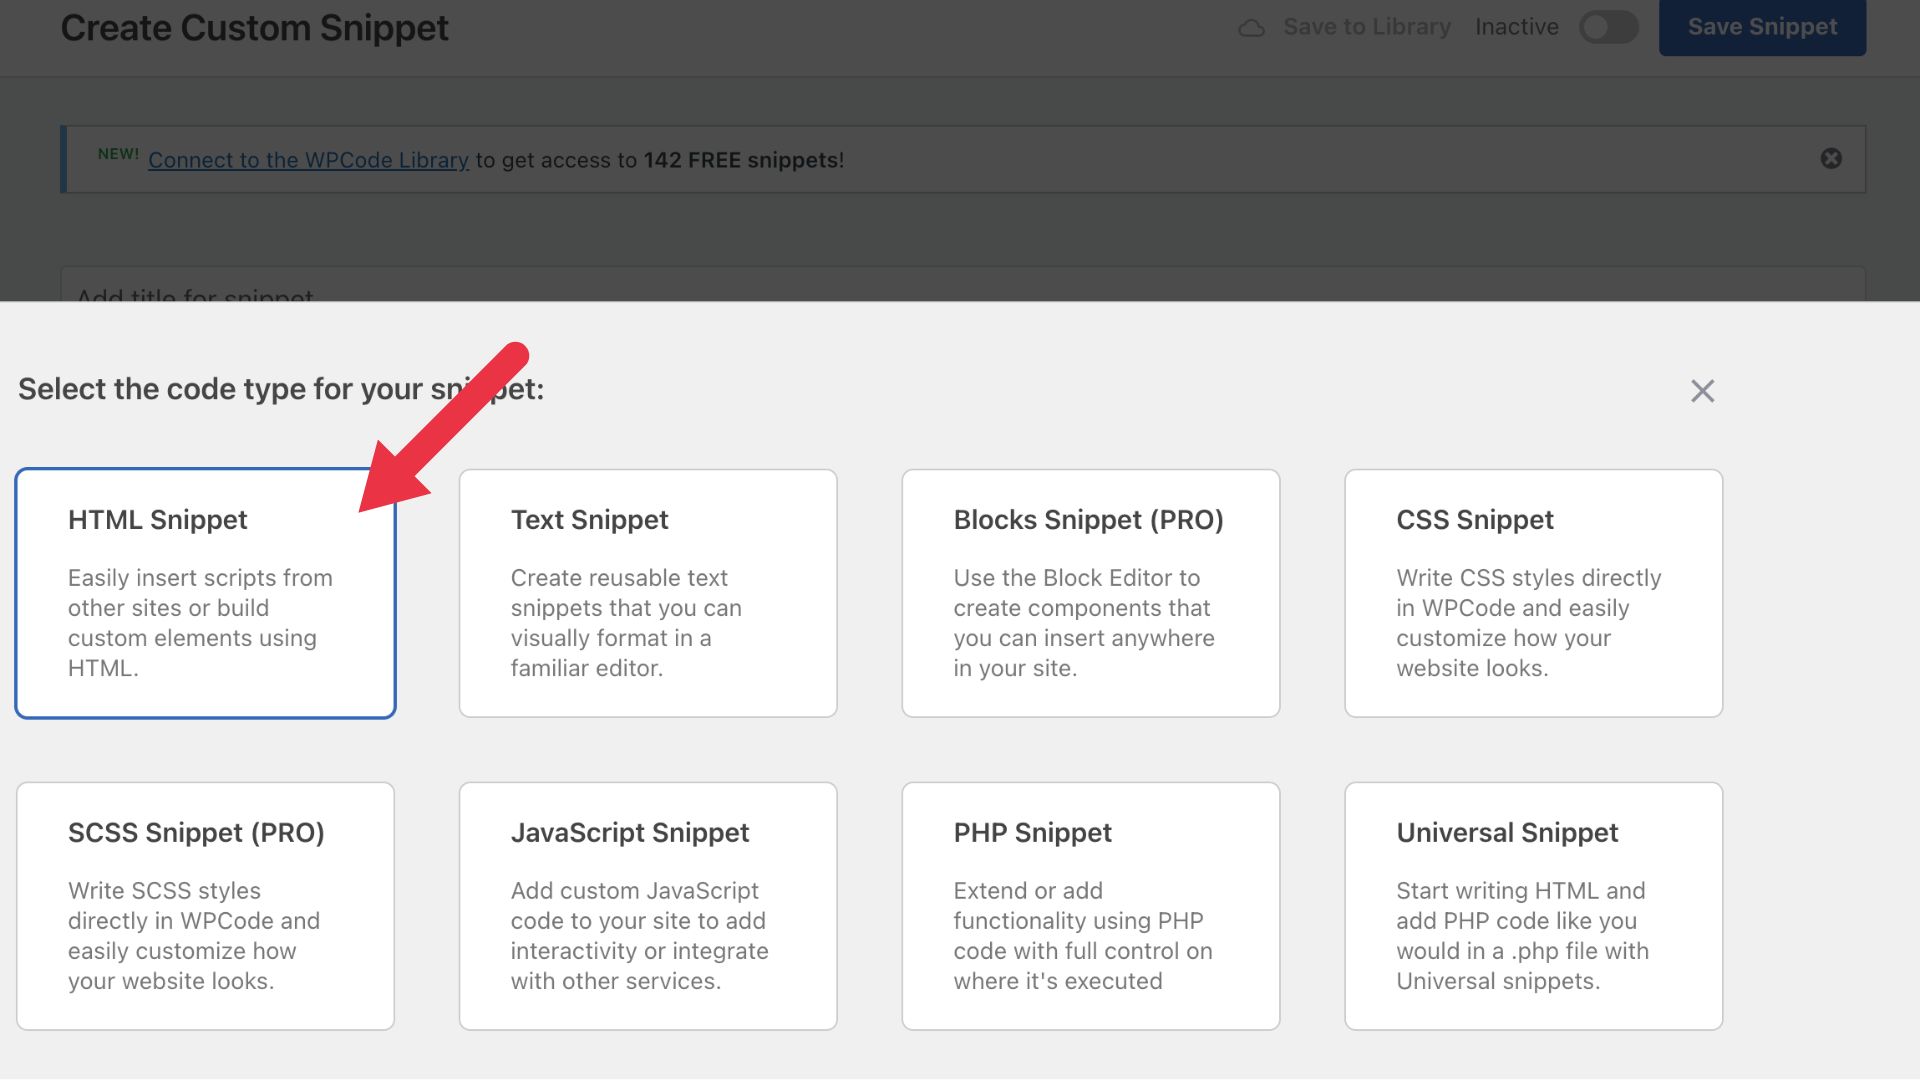
Choose HTML Snippet
When asked to choose a code type, select HTML Snippet.
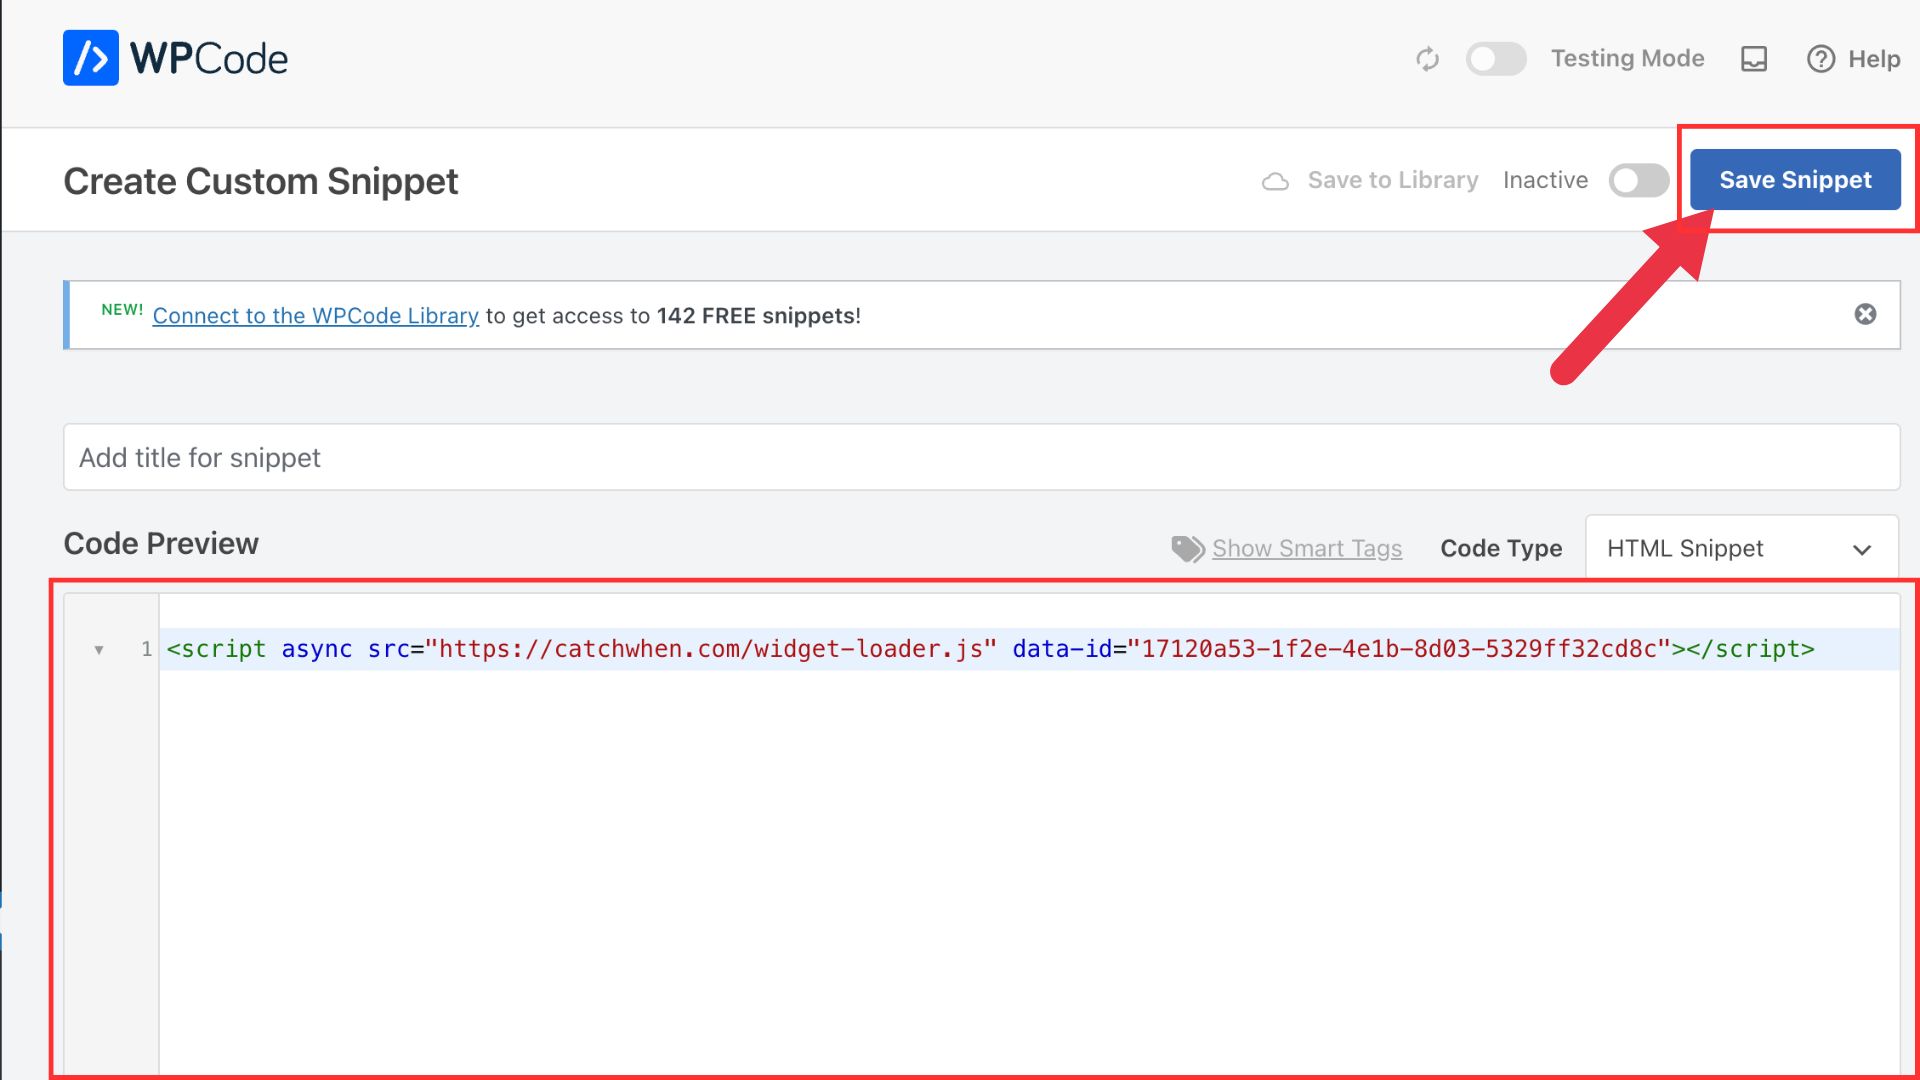
Paste your code and save
Paste the embed code you copied in Step 1 into the code editor area. Then click the Save Snippet button in the top right corner.
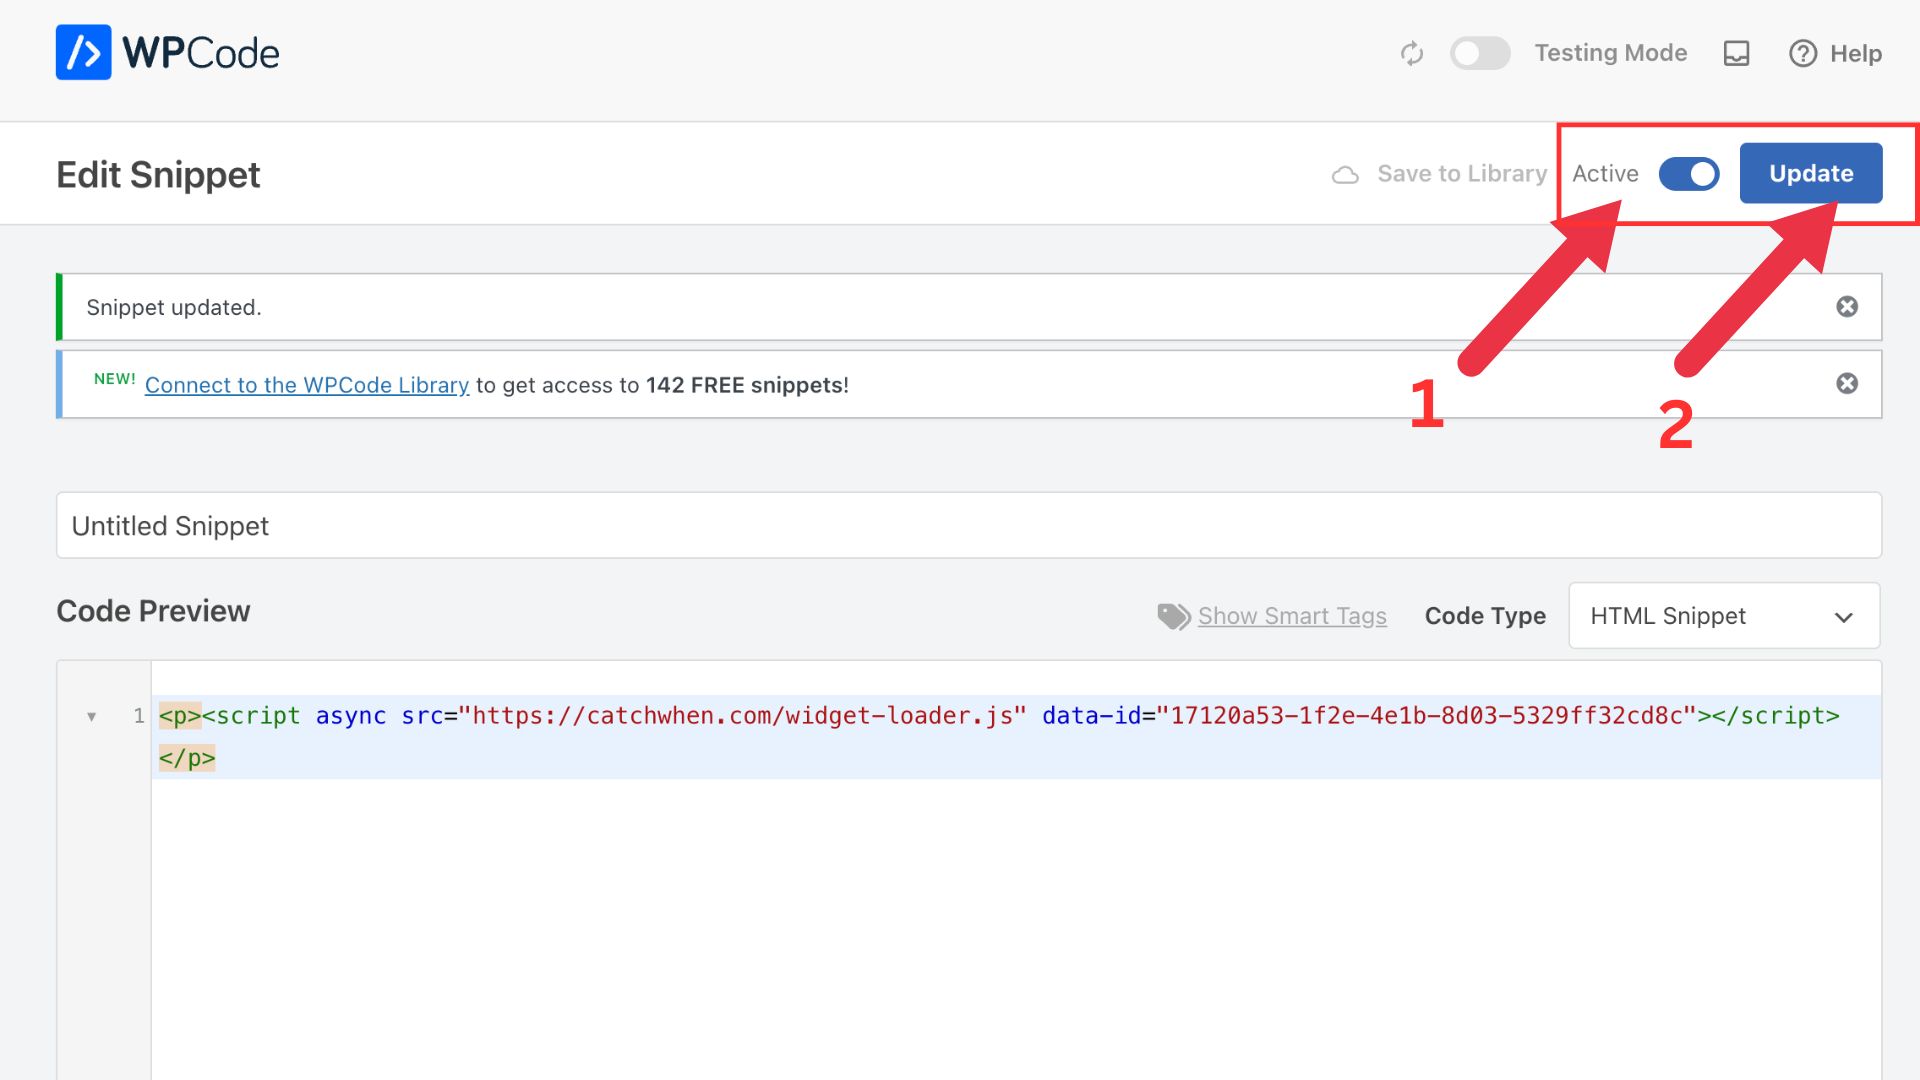
Activate the snippet
After saving, toggle the Inactive switch to Active, then click the Update button. The chat widget will now appear on your WordPress site.
Customizing Your Website Agent
You can customize the appearance of your Website Agent on the CatchWhen dashboard. Click the tab in the left menu to reveal the appearance and chat interface options.