Resources
Add the Chat Widget to Your Website
This guide shows you how to add the CatchWhen chat widget to your website. It takes about 2 minutes and you only need to copy and paste one small piece of code.
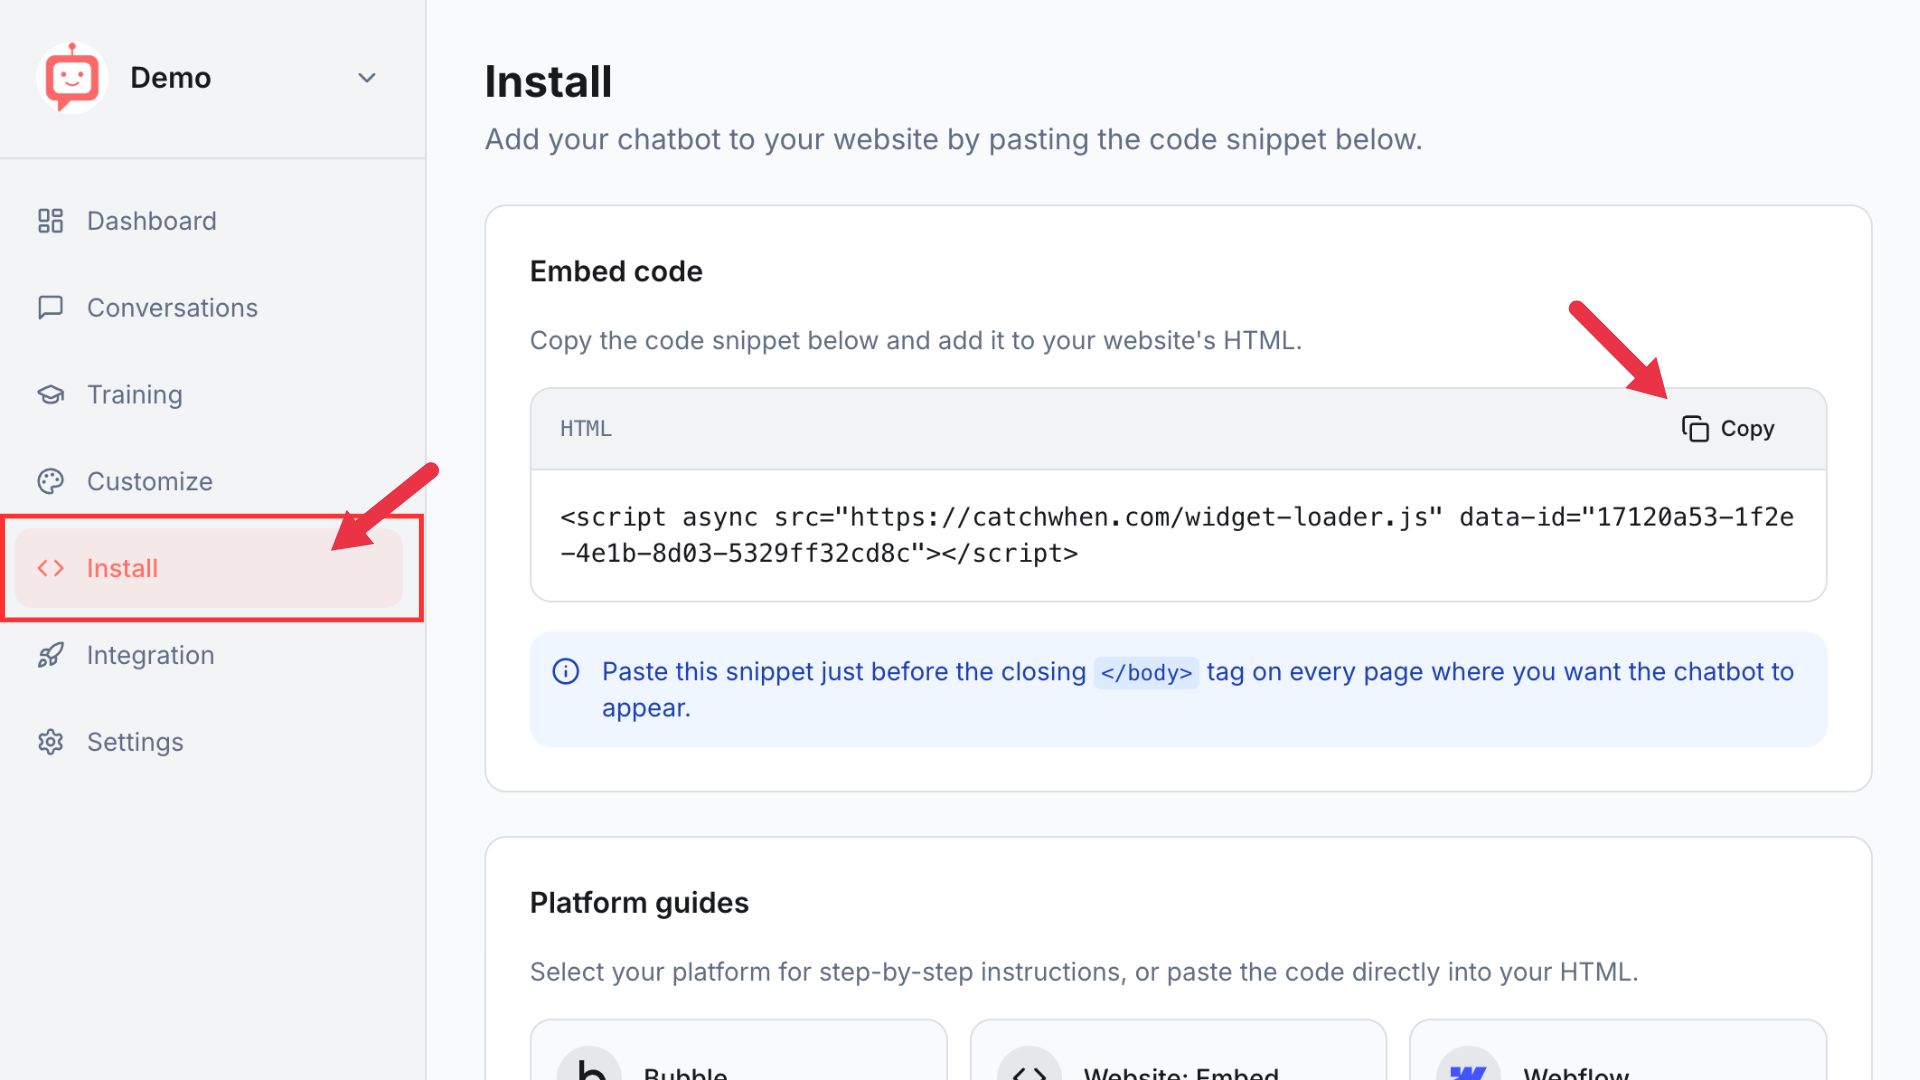
Copy your install code
Navigate to your Dashboard page and click the Install tab in the left menu. You'll see a code snippet on the screen. Click the Copy button to copy it.
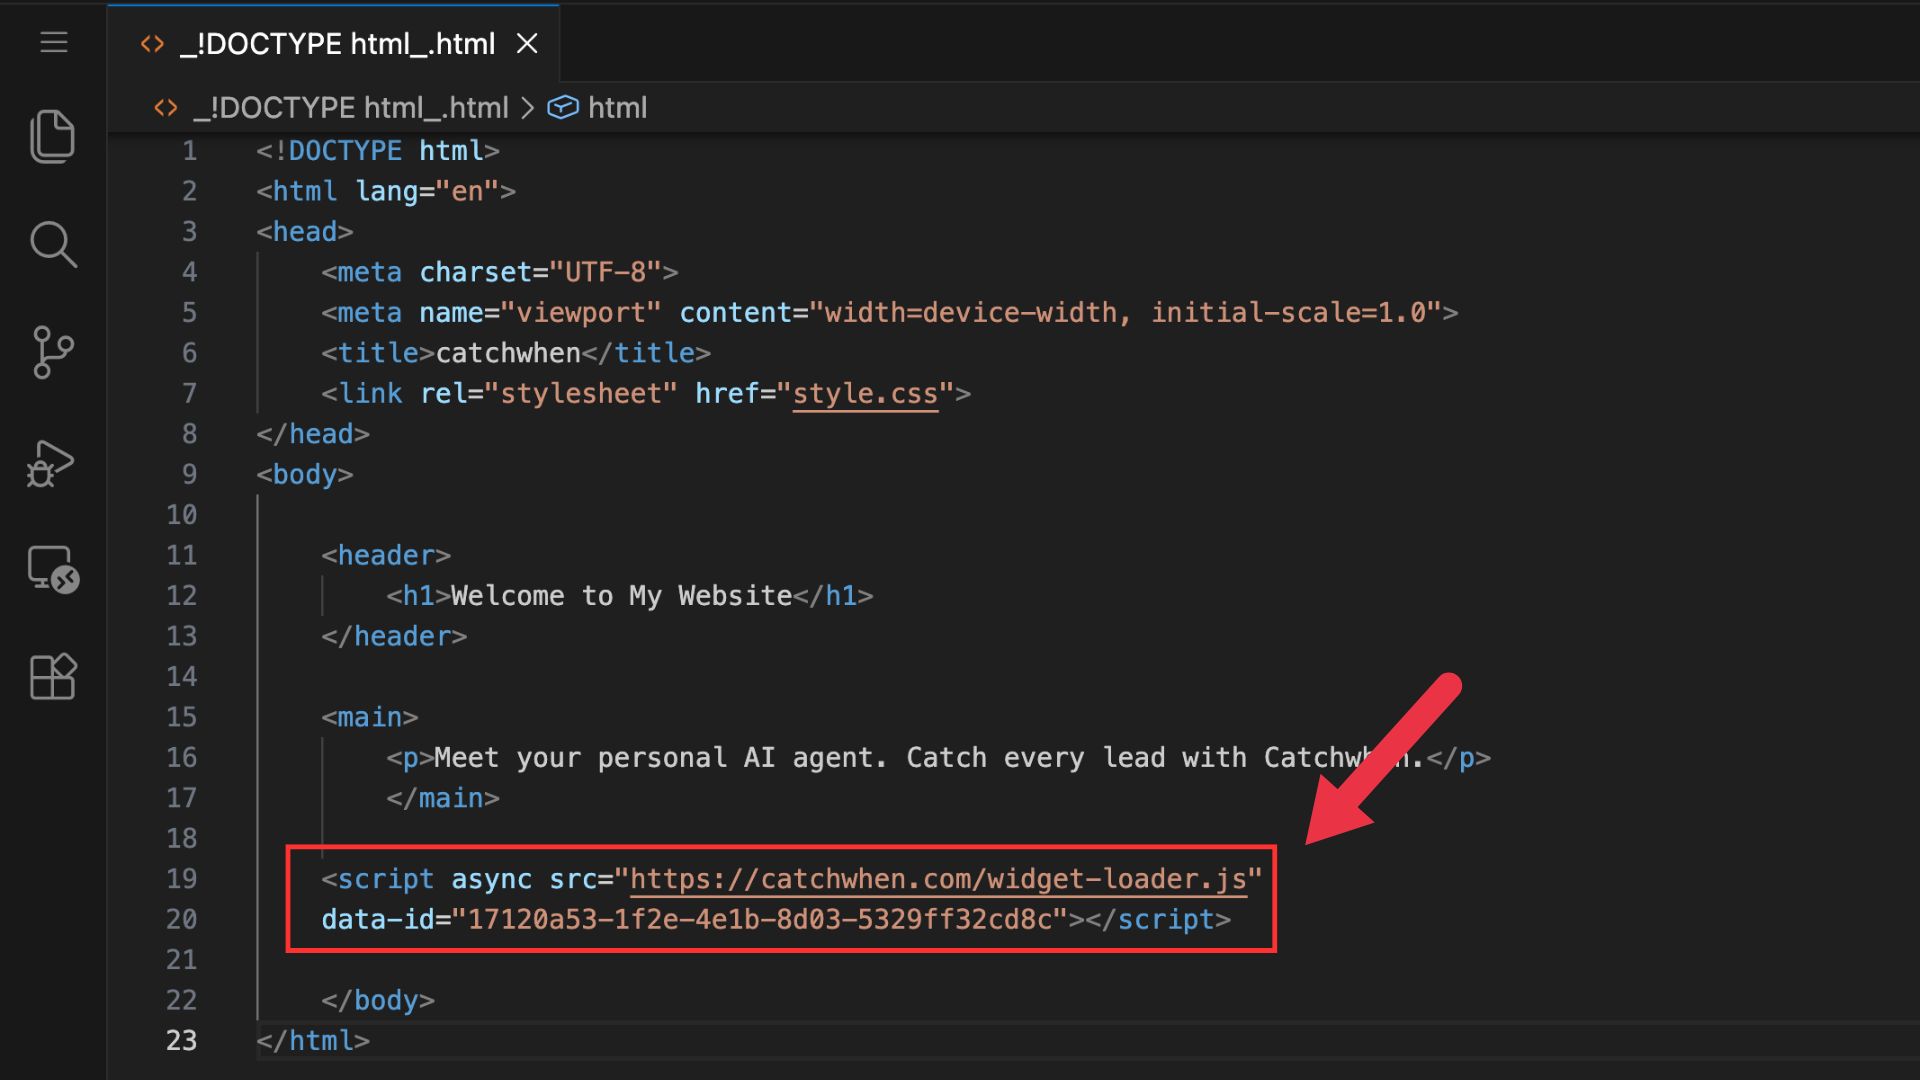
Paste it into your website
Open your website's HTML file and paste the code just before the closing </body> tag.
Save the file, deploy your site, and reload it in your browser. The chat widget will appear in the bottom right corner.
Check that it's working
Visit your website and look for the chat widget in the bottom right corner. Click it and send a test message to make sure everything is working as expected.
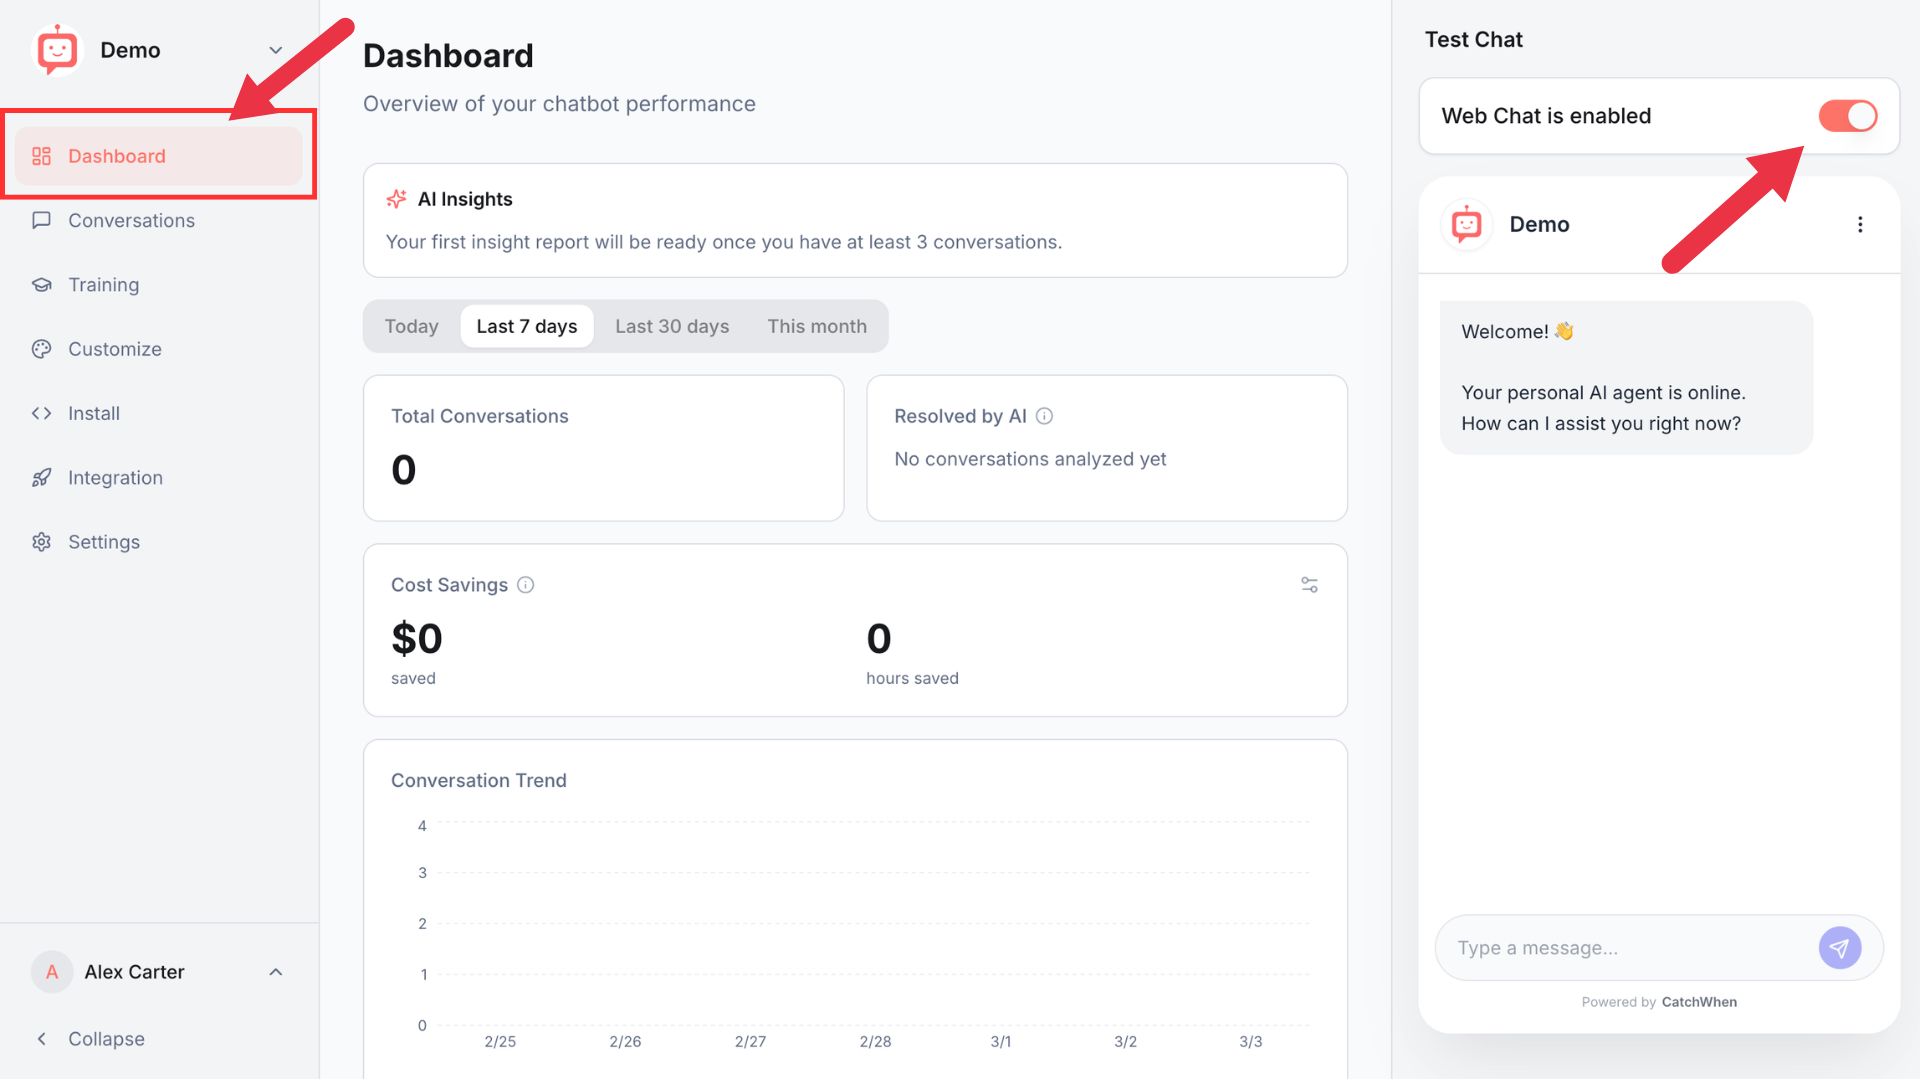
Disabling the Widget
Go to the Dashboard tab. On the right side you'll see the Test Chat panel where you can use the disable toggle to turn off the chat widget instantly. No code changes needed.
Customizing Your Website Agent
You can customize the appearance of your Website Agent on the CatchWhen dashboard. Click the tab in the left menu to reveal the appearance and chat interface options.