Resources
Add the Chat Widget to Your Webflow Site
This guide shows you how to embed the CatchWhen chat widget into your Webflow site. You'll paste the embed code through Webflow's custom code settings. No plugins required.
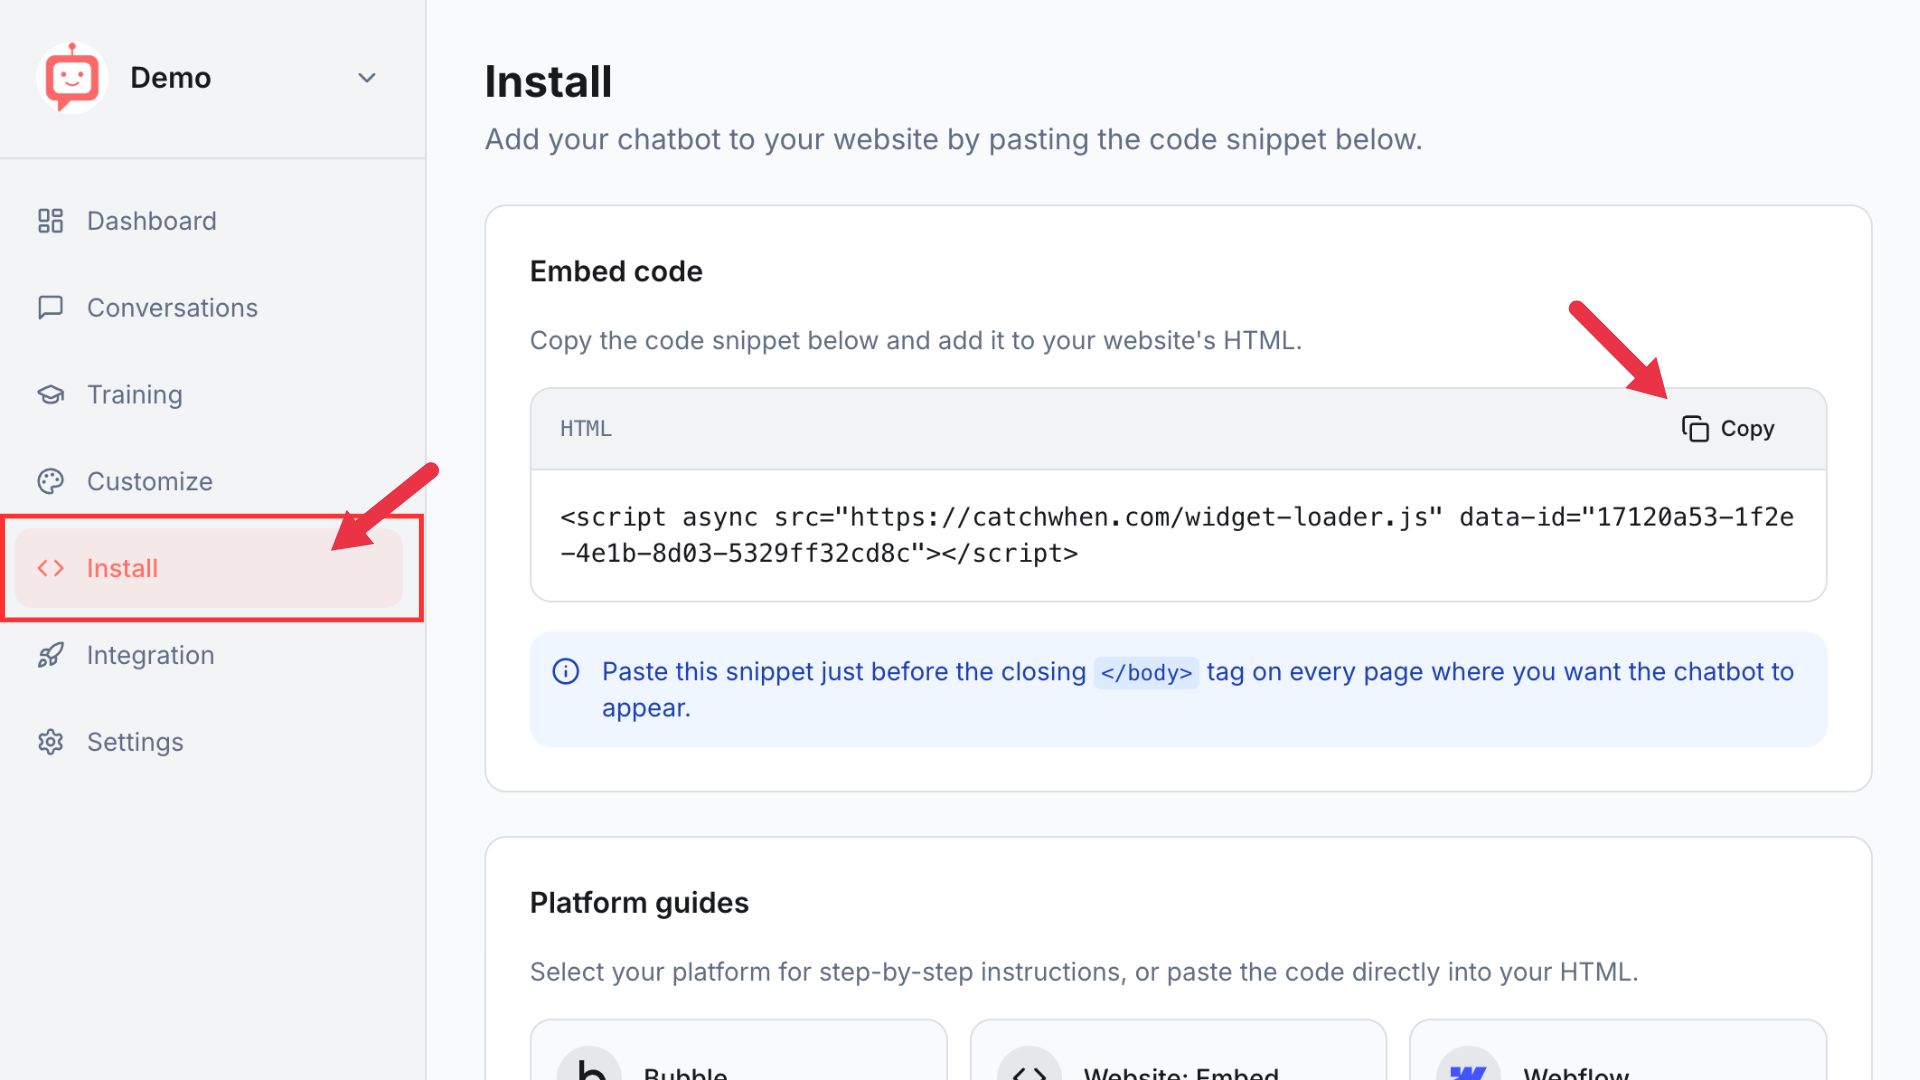
Copy your CatchWhen embed code
Navigate to your Dashboard page and click the Install tab in the left menu. You'll see a code snippet on the screen. Click the Copy button.
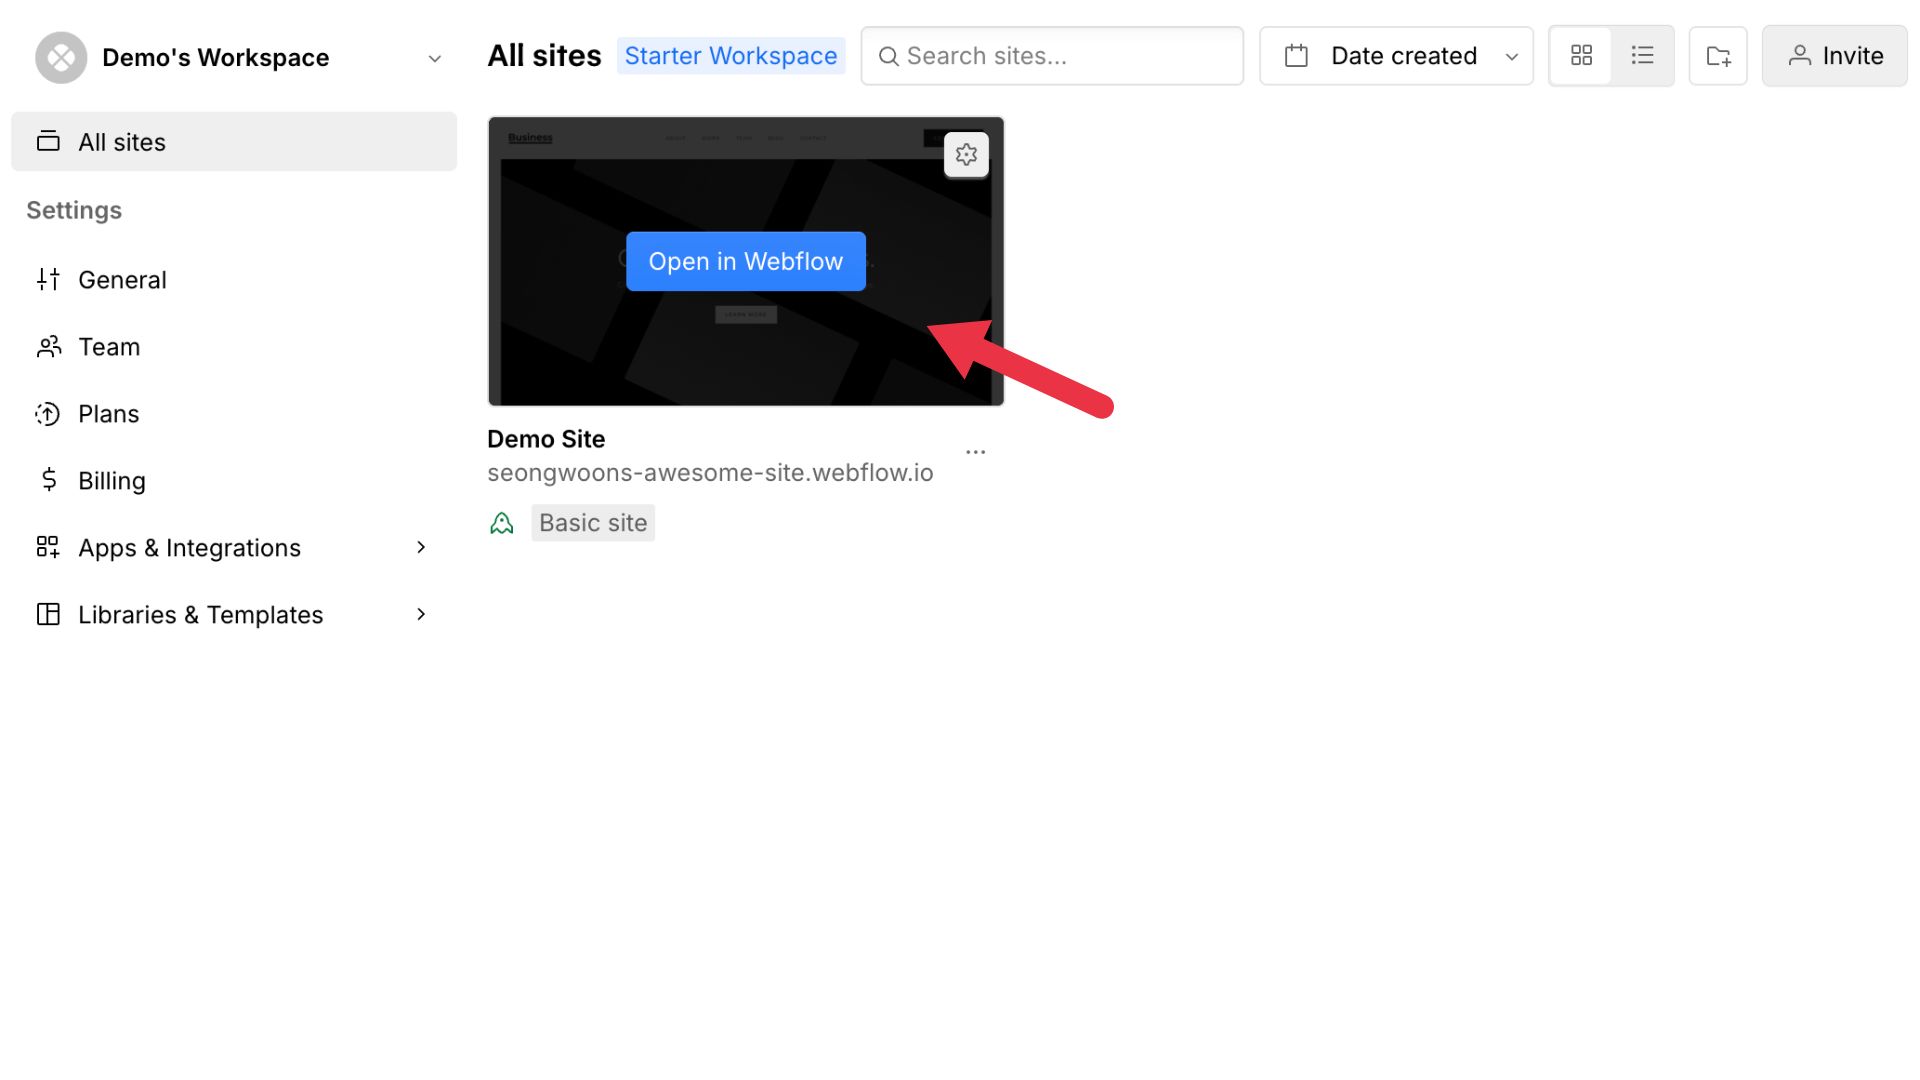
Open your site in Webflow
On your Webflow dashboard, you'll find a list of all your website projects. Hover on the website you want to add the agent to and click on Open in Webflow.
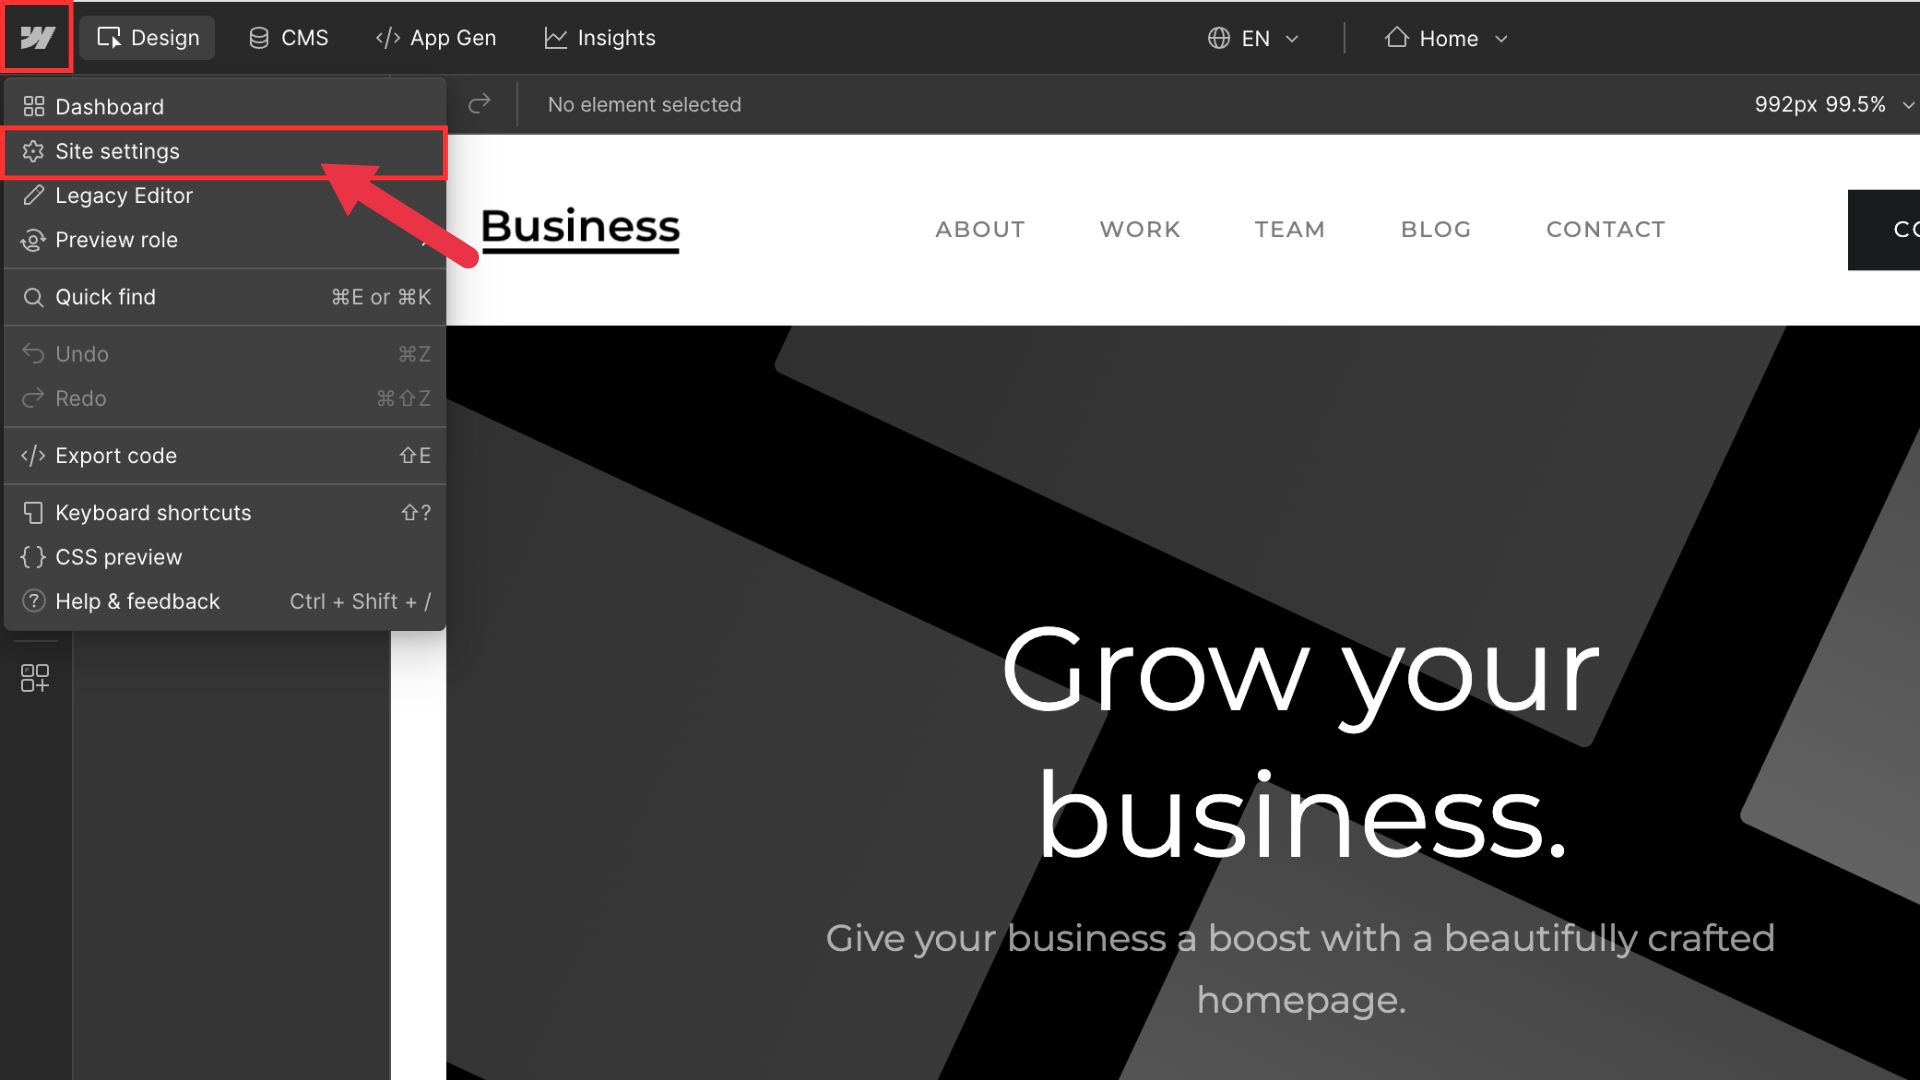
Open Site Settings
On the Designer page, click the Webflow icon in the top left corner. A menu will appear. Click on Site Settings to open your site's configuration page.
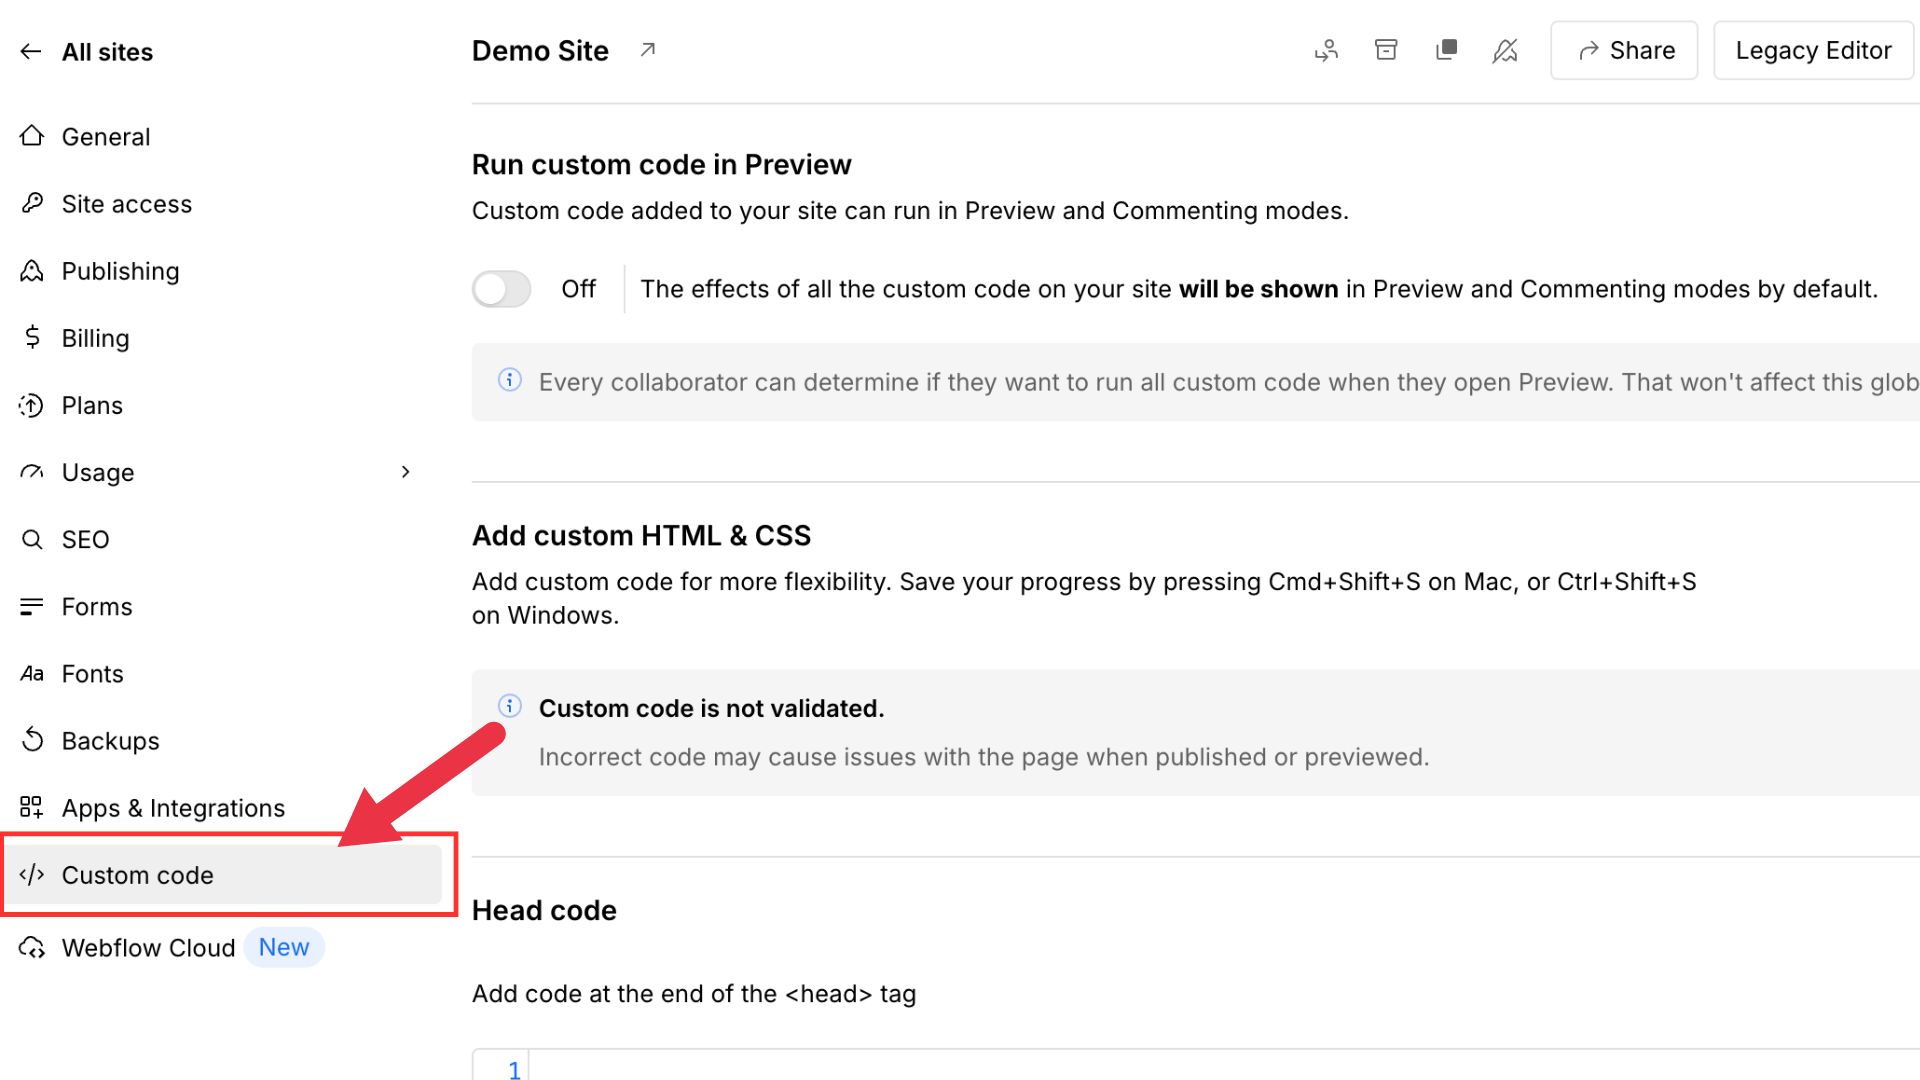
Go to Custom Code
In the left menu, click Custom Code.
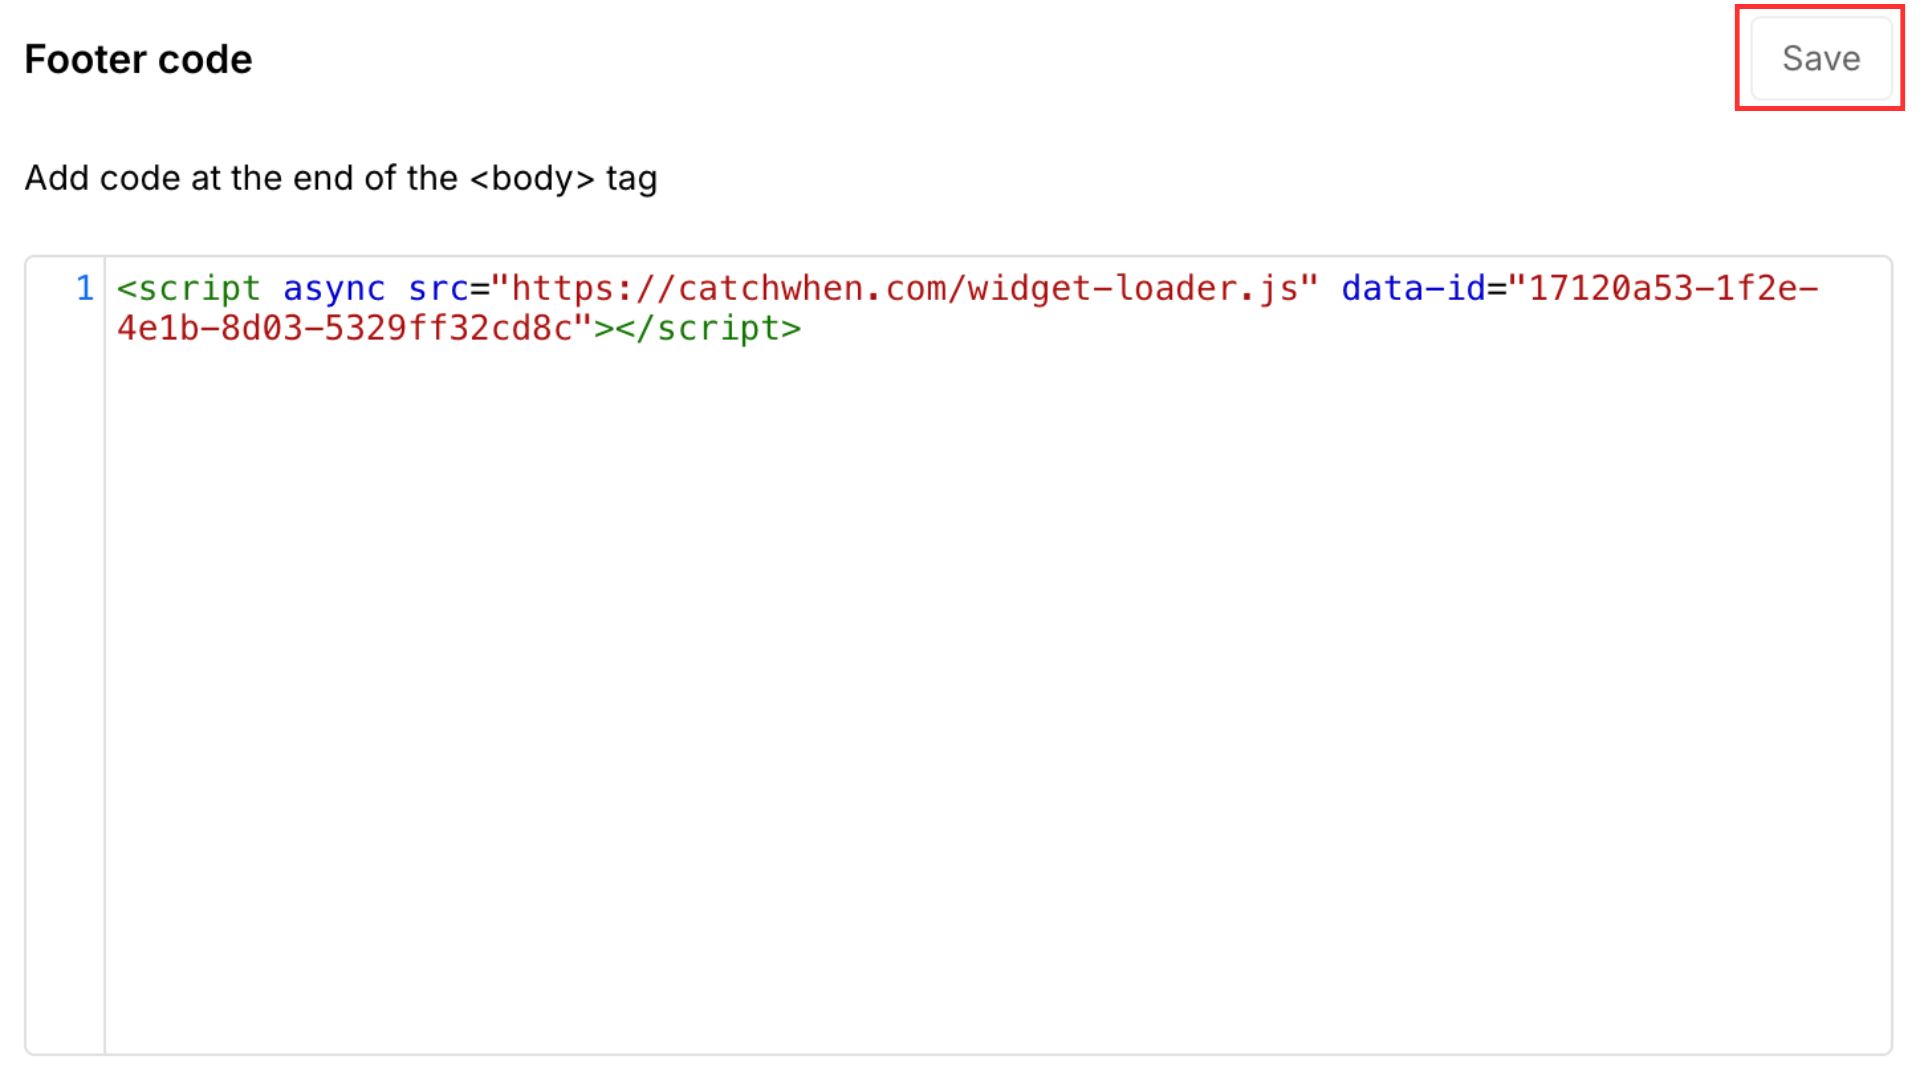
Paste the code into Footer Code
Scroll down to find the Footer Code section and paste your copied embed code there. Click Save when you're done.
Publish your site
Click the Publish button in the top right corner. Once your site is live, the chat widget will appear in the bottom right corner of your website.
Customizing Your Website Agent
You can customize the appearance of your Website Agent on the CatchWhen dashboard. Click the tab in the left menu to reveal the appearance and chat interface options.